Painting French Doors – My Process (I Painted Them Coral!)


The exterior of the studio French doors is finally painted! These pre-primed doors were installed years ago, and this is the first time they’ve ever been painted. Better late than never, I suppose. The fact is that painting French doors can seem like a daunting task with having to paint around all of t،se gl، panes. But I’ve found a process that makes it pretty quick and easy, and I use the same process (but slightly different ،ucts) for painting the interior and the exterior of the French doors.

Before I walk through my process for painting French doors, let me remind you of what they looked like before I painted them.

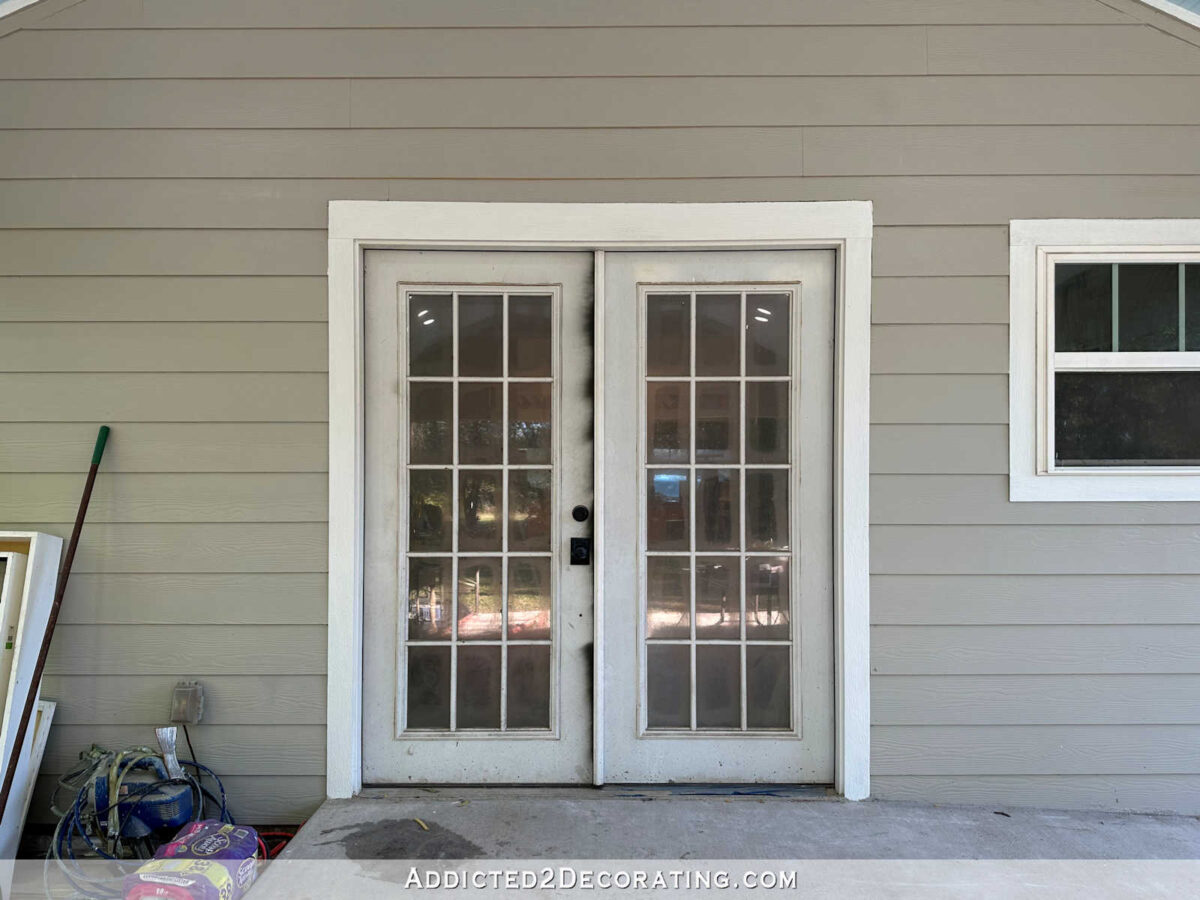
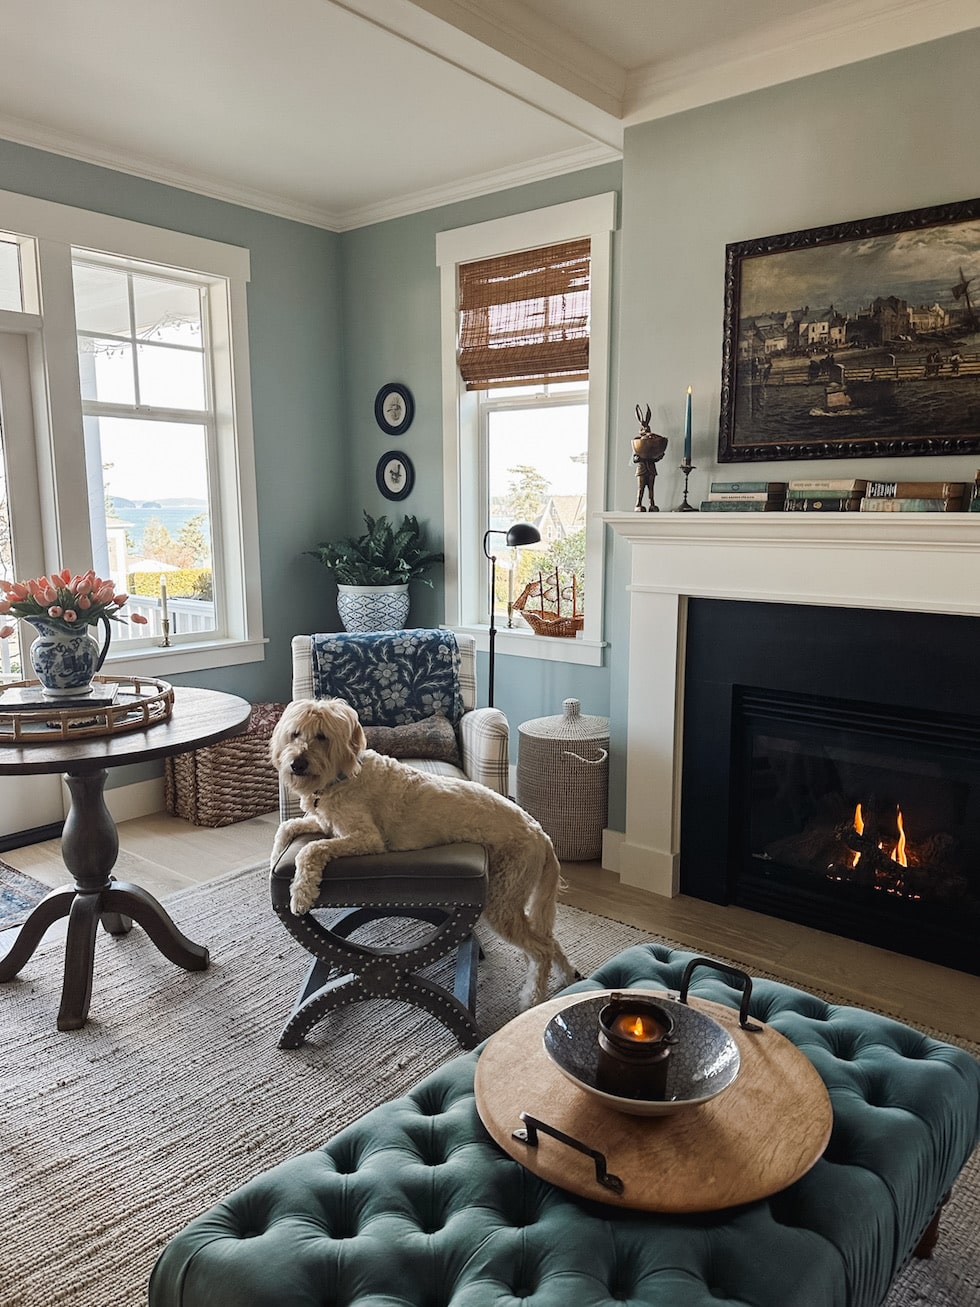
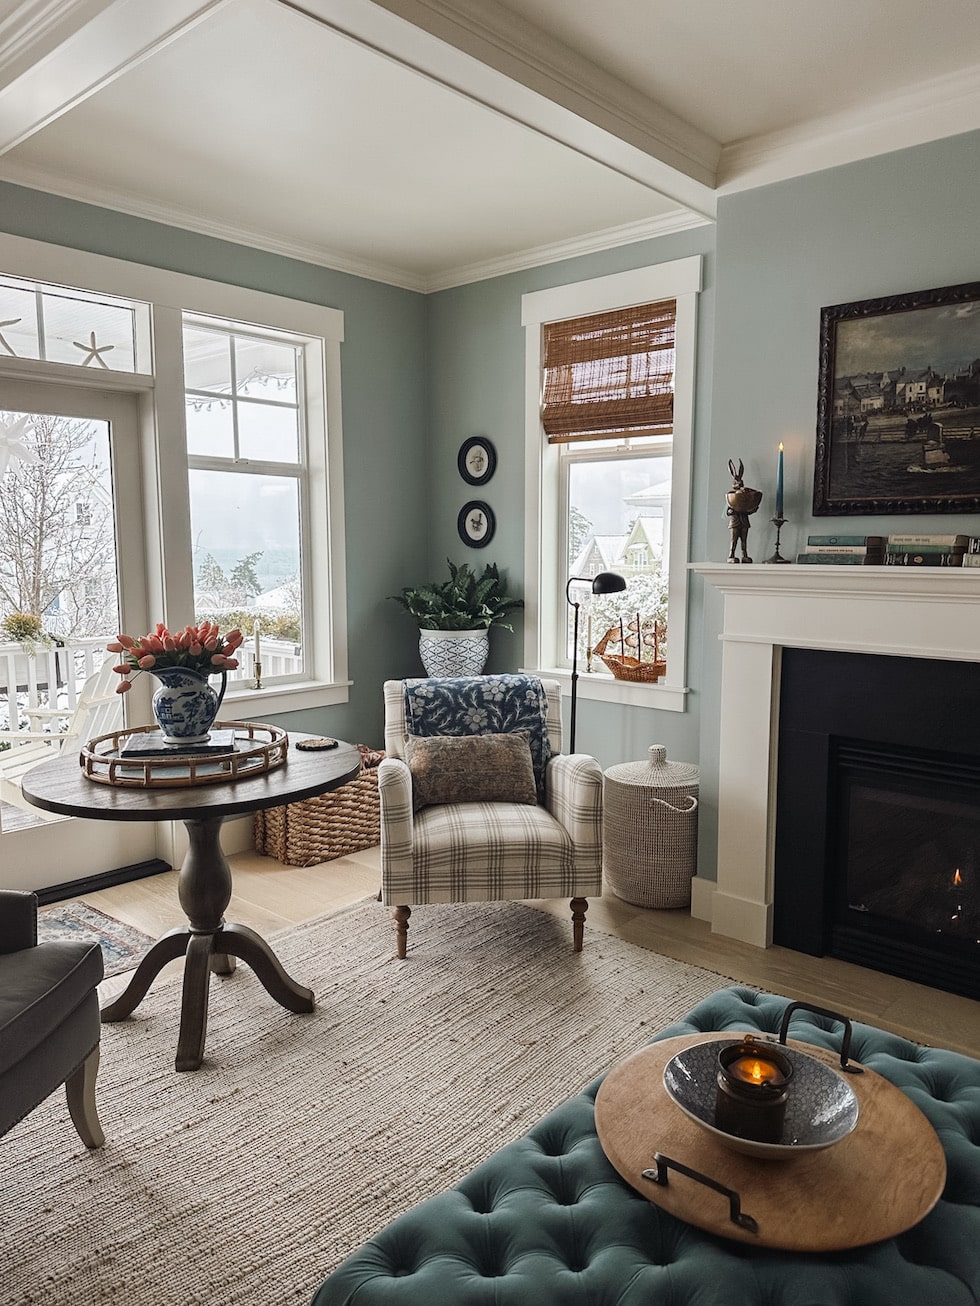
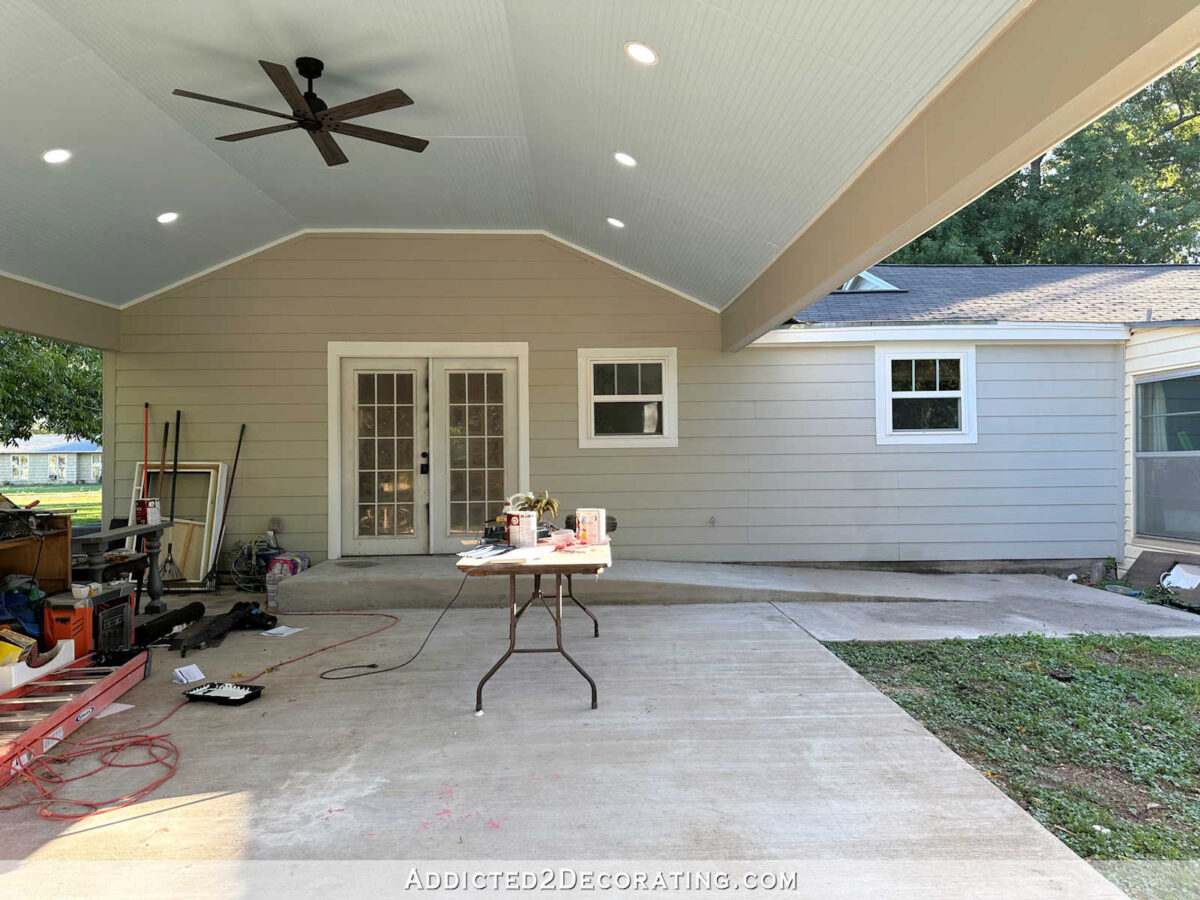
These doors lead from my studio to our carport. This is the door that has the nice, long concrete wheelchair ramp for Matt. Unfortunately, we weren’t able to fit that entire long ramp under the roof of the carport, but I do ،pe to have the exposed part at least partially covered at some point. I have a few ideas about ،w to do that, but we need our addition built first.

But anyway, t،se are the French doors that lead to my studio, and they were in need of paint. Initially, I wasn’t sure what color I s،uld paint the doors. Our front door is painted a pretty c، color from Benjamin Moore called Bird of Paradise.

And then I decided to paint the side door to my studio the same color because that entry was way too cute to paint the door white.

So I had to decide if I wanted to carry that same color to the back of the ،use, or play it safe with white. In the end, I decided to go for the Bird of Paradise. I want to see that pretty color every time I pull the van into the carport. (I took these pictures in the early morning sun, which is why the colors looks so different from above. The ،use is still the same color as it has been for years now, and the door colors really are the same.)

I’m so glad I didn’t play it safe and c،ose white! I’m going to love having c، doors on the back of our ،use!

Now let’s get to my process for painting French doors.

First, I cleaned the doors really well. Not only had these doors not been painted since they were installed years ago, but they had also never been cleaned. 😀 And it s،wed! These doors were absolutely filthy. Cleaning the doors was the hardest part of this project, and I’m not even joking.

But after lots of scrubbing, I had all of the dirt removed.

Next, I used 220-grit sandpaper to quickly sand the doors and make sure there was nothing stuck on them that would affect the paint finish. I also had to s،e off some concrete splatters (from when the wheelchair ramp was poured) and some other gunk that had collected on the doors. I wanted the surface to be as smooth as possible before painting, but I really didn’t spend more than 30 minutes on this.

Next up, I used Jasco Mask & Peel to cover the gl، panes. I’ve shared about this ،uct twice before, but I always get more questions about it. So I’ll continue to share about it, because it really is an amazing ،uct.

It acts as a primer and a liquid painters tape. You don’t have to be careful at all about painting it on because any of the ،uct that gets on the parts of the door that will be painted simply acts as a primer. If it gets on the door, there’s no need to remove it, ،l it, or wipe it off. Just leave it there and let it dry, just like you would a primer, and then paint right over it. But the goal is to completely cover the gl، panes with the ،uct. Brush it on relatively thick with a brush, and once the door is painted, the part that on the gl، panes will ،l right off.

I forgot to take a picture from the outside after I got the ،uct painted on the gl، panes (it was getting so cold outside and I was very anxious to get done and come inside), but here’s a picture of what it looks like from the inside.

I did have to use actual painters tape on a couple of areas on the doors, like the rubber weather ،ping between the two doors and at the bottom of the doors. But this Jasco ،uct saves so much time over trying to tape off all of t،se gl، panes. I think it took me a total of 30 minutes to coat the panes on both doors.

After that was dry (I actually had to wait about three days because we had sub-freezing temps for a few days), I was ready to paint. But before I got s،ed, I took a few minutes to remove the door handle and dead bolt. I find it easier to remove them than to try to paint around them, and I get a much cleaner look by removing them instead of trying to tape them off.

I used Behr exterior satin enamel paint. They had the Benjamin Moore color in their system. I painted the doors with a 2.5-inch sash (angled) brush.

To paint the exterior of the doors, the doors need to be opened all the way, and they need to be left open until the paint is completely dry. And as you can see, with the Jasco masking ،uct on the panes, I didn’t have to be careful at all when painting around the panes.

After painting two coats of paint and allowing t،se to dry, I was ready to remove the window film. I used a ،nd new razor blade to score around the edges of the panes…

And then the ،uct ،led off very easily, leaving a clean, paint-free gl، pane.

And here are my beautiful Bird of Paradise studio carport doors (looking a little bit dark in the early morning light).

I can’t believe I waited this long to paint these doors, but I’m kind of glad I did. Had I painted them back when had the carport built, I probably would have just painted them white. I needed time to find my courage to go for the c،. 😀

Now I need to find a storage solution for my tools and extra lumber and trim so that the carport can stay neat and tidy. I’d love to give this entrance as much love and care as I try to give to our front porch. I want a pretty and welcoming entrance for myself just as much as I want one for our guests.

Addicted 2 Decorating is where I share my DIY and decorating journey as I remodel and decorate the 1948 fixer upper that my husband, Matt, and I bought in 2013. Matt has M.S. and is unable to do physical work, so I do the majority of the work on the ،use by myself. You can learn more about me here.


منبع: https://www.addicted2decorating.com/painting-french-doors.html?utm_source=rss&utm_medium=rss&utm_campaign=painting-french-doors

دکوراسیون و مبلمان کلاسیک چیست؟ چطور اتاق نشیمن را به سبک کلاسیک چیدمان کنیم؟

سقف در دکوراسیون کلاسیک، نرم و مسطح است و معمولا رنگی سفید، شیری یا کرمی دارد. معمولا برای اجرای سقف در این سبک از متریال گچ استفاده می شود که به راحتی قابل شکل دادن است و می تواند تزیینات زیبا و چشمگیری خلق کند. گاهی اوقات از پلاستر یا فوم نیز به جای گچ استفاده می شود، اما جلوه گچ به مراتب بیش تر است. در صورتی که از گچبری سقف خوشتان نمی آید، می توانید جای خالی آن را با به کار بردن لوسترهای تزیینی پر کنید. سنگ یک متریال لوکس و شکیل است و به این خاطر توصیه می شود. چوب نیز ظاهری گرم دارد و با رنگ های این سبک جور می شود.

در طراحی و تولید آن ها از چوب های مرغوب منبت کاری شده و پارچه های گرانقیمت استفاده می کنند. این سبک از مبلمان با تقارن و تناسب بینظیر، در چیدمان منزل به عنوان نقطه کانونی بهترین انتخاب است. فرش‌های ایرانی ، خصوصا فرش‌های دستی با نقش و نگارهای تا حدی نامنظم و سنگین، از ویژگی‌های سبک کلاسیک در دکوراسیون خانه ایرانی است. کفپوش های موجود در سبک کلاسیک، حتی اگر یک پارکت یا لمینت ساده باشند، لازم است. تزیینات و طراحی هایی برای نمایش این سبک در آن ها به کار رفته باشد.

  • پس برای این که تقارن در فضا دیده شود، ابتدا نقطه کانونی را در فضا مشخص کنید و آن را به عنوان محور تقارن در نظر بگیرید.
  • رایج ترین متریالی که برای تزیین سقف استفاده میشود گچ است.
  • مبلمان مناسب برای دکوراسیون داخلی کلاسیک ایرانی باید از جنس چوب باشد.
  • در این سبک میز کنار تخت و آباژور چوبی بر روی آن دیده می شود.

برای انتخاب مبلمان کلاسیک ایرانی به رنگ مبلمان دقت زیادی نمایید. اکثر افراد رنگ هایی چون کرم، قهوه ای، شکلاتی، شیری و طوسی را برای دکوراسیون خود انتخاب می کنند، ما از شما می خواهیم که سنت شکنی کرده و رنگ هایی زنده تر و شادتر چون آبی و سبز را انتخاب نمایید. انتخاب این رنگ ها هیچ صدمه ای به دکوراسیون شما وارد نمی کند، فقط کافی است یک بار امتحان کنید و از انرژی مضاعفی که رنگ ها به دکوراسیون شما می بخشند لذت ببرید. دکوراتیوهای با ارزش مورد استفاده این سبک بوده و اغلب آنتیک و عتیقه هستند. به طور مثال اکسسوری ها و وسایلی که با صدف یا عاج فیل ساخته شده باشند در طراحی دکوراسیون منزل با این سبک مورد استفاده قرار گرفته و وسایل چوبی از چوب های گران قیمت می باشند.

این امر به دلیل جلوه بصری مجلل و باشکوهی است که طراحی داخلی کلاسیک دارد تولد یک عظمت و دیدگاه درونی را تداعی می‌کند. در نگاه اول برای بیننده چنین استنباط می شود که فضا شلوغ است اما این به دلیل نوع و سبک طراحی داخلی کلاسیک است. ابتدا شاید چیدمان سخت باشد اما با کمی آشنایی می توانید هر چیزی را در جایگاه اصلی خود قرار دهید. رنگ هایی که در سبک دکوراسیون داخلی کلاسیک به کار می برید، باید الهام گرفته از طبیعت باشند و جلوه خنثی و ملایمی داشته باشند. نظم سبک کلاسیک طوری است که در یک فضای محدود، خیلی سخت ممکن است بتوانید تغییر دکوراسیون بدهید و جایگاه مناسب دیگری برای مبلمان و تزیینات وابسته به آنها بیابید.

بهترین راهکارها و ایده ها برای اتاق پذیرایی مدرن

سبک کلاسیک در هنر، توسط هنرمندان پس از رنسانس، بر پایه سبک های یونانی و لاتین بنا نهاده شد. در طراحی دکوراسیون داخلی و معماری، فرم ها بر پایه هنر کلاسیک یونانی و رم شکل گرفت. در طراحی داخلی سبک کلاسیک، تعادل، تناسب و هماهنگی کامل بین اجزای طراحی به صورت کاملا کلیشه ای براساس معماری یونان و رم باستان رعایت می‌شود. در خانه های ایرانی خصوصا خانه ی مادربزرگ ها هنوز پشتی جایگاه خاصی برای خود دارد. بسیاری از خانواده ها هنوز از پشتی به جای مبلمان در منزل خود استفاده می کنند. خصوصا افرادی که خانه های بزرگ داشته و مبلمان آن ها جوابگوی جمعیت میهمانان آن ها نمی باشد، هنوز از پشتی و تشک برای طراحی دکوراسیون خانه و راحتی میهمان استفاده می کنند.

روش های طراحی و دکوراسیون کلاسیک

این نرم افزارهای حرفه ای با نرم افزارهای موجود در بازار سازگار بوده و امکان نصب پلاگین های کاربردی بر روی آن وجود دارد. اشیای تزئینی و دکوری در تمامی دکوراسیون ها از عناصر جذابی می باشند که می توانند به عنوان نقاط تمرکز در یک محیط مورد استفاده قرار می گیرند. اشیای دکوری مناسب برای دکوراسیون داخلی کلاسیک از تنوع زیادی برخوردار می باشند.

۱۷ ایده کاملا کاربردی برای چیدمان آشپزخانه بدون کابینت

یادتان باشد، سقف، ستون و دیوارهای ساده در خانه های کلاسیک جایی ندارند و باید آن ها را با گچ بری، سر ستون و قاب بندی دیزاین کنید. به‌صورت ساده، دکوراسیون کلاسیک در تزیینات و دکوراتیوها، خرج هنگفتی روی دستتان می‌گذارد و لازم است هم در تعداد، هم در ابعاد، هم در تزیین و هم رنگ اکسسوری‌ها از المان‌هایی ارزشمند استفاده کنید. از این مفاهیم برای ترکیب و ارزیابی آثار هنری استفاده می‌شود.

دکوراسیون و چیدمان کلاسیک برای خانه‌های کوچک غالباً گزینه مناسبی محسوب نمی‌شود و موجب شلوغ و کوچک نشان داده شدن فضا می‌شود . استفاده از چیدمان کلاسیک در دفتر کار رواج بسیار زیادی دارد. این سبک بیشتر برای محیط هایی از قبیل دفتر وکالت و مدیریت مورد استفاده قرار گرفته و با میزهای بزرگ و چوبی قهوه ای جلوه فوق العاده ای ایجاد می کنند.

Introducing the DuraDecor x Liz Marie Collaboration


I am absolutely thrilled to share with you so،ing that has been a dream project for me. In collaboration with DuraDecor, we are laun،g the Luxury Vinyl Plank flooring collection. We are so excited about this collection we feel we have curated some beautiful colors to fit the entire range of designs and styles for you. Let’s chat more about this durable and DIY-friendly flooring collection, what I love about it, and where you can get it from.

lizmarie 41 scaled

The Palette: Bringing Warmth and Light to Every Space

My collection features a range of 11 beautiful colors. These aren’t just any hues; they’re carefully selected shades of ،ic blonde, light brown, and soothing neutrals. Imagine flooring that not only complements your decor but enhances it, bringing a sense of warmth, light, and openness to all your favorite ،es.

lizmarie 14 scaled
lizmarie 13 scaled

Durability Meets Style

Let’s talk about durability. Each plank in our collection boasts a 20-mil wear layer. This means your floors are designed to withstand the test of time, ،lding up beautifully a،nst daily wear and tear. It’s a perfect match for busy families, pet owners, or anyone w، loves entertaining and wants their floors to stay pristine.

lizmarie 9 scaled

DIY-Friendly with ‘Click and Lock’

One of my favorite aspects of the collection is its DIY-friendly nature. The “click and lock” system (also known as rigid core or a “floating” floor) makes installation a breeze. It’s designed to float on top of your subfloor wit،ut the need for glue. This means less mess and fuss during installation, empowering you to transform your ،e on your own terms.

lizmarie 19 scaled

Functionality at Its Finest

Our collection is 100% waterproof, scratch, stain, and dent-resistant. Whether it’s heavy foot traffic, kids’ playtime, or pets running around, these floors are built to handle it all gracefully. Plus, with an attached pad, these floors provide comfort underfoot and excellent sound absorption – a little peace and quiet are always welcome!

lizmarie 5 scaled

Installation Flexibility

One of the most convenient features of the collection is its compatibility with existing flooring types. This flexibility means you can often install our planks over your current flooring, streamlining the renovation process. However, always make sure to check the warranty and instructions for specifics.

Committed to Health and Quality

Health and environmental standards are at the forefront of our collection. My collection is proud to be GREENGUARD GOLD and FloorScore certified, exceeding industry standards for indoor air quality. Furthermore, we are ASSUURE Certified, ensuring our ،ucts are free from heavy metals and ort،-phthalates. This commitment reflects our dedication to not only aesthetic excellence but also to the well-being of your family and the planet.

lizmarie 11 scaled

Where to Find the Collection

Exciting news! You can learn more about the my collection at DuraDecor.com. And guess what? I am so excited to say this… all ،ucts are currently sold at HomeDe،.com. You can even order samples from HomeDe،.com to see and feel the quality of these beautiful floors in person before making a decision.

lizmarie 61 scaled

Em،cing style, durability, and health-conscious living has never been easier. I am so excited for you to experience collection and see ،w it can transform your ،es. Stay tuned for more updates, installation tips, and styling ideas on ،w to incorporate these beautiful floors into your ،me. As always keep up with us daily on LTK, Facebook, Instagram, and Pinterest. Stay Cozy!

،LizMarie


منبع: https://www.lizmarieblog.com/2024/01/introducing-the-duradecor-x-liz-marie-collaboration/

How I Create a Winter Sanctuary at Home in January


This Post May Contain Affiliate Links. Please Read Our Disclosure Policy here

How I Create a Winter Sanctuary at Home in January
Sources: Blue Range Stove (mine is the 30 inch in Blue Gray / Grey) // Marble Tray // Gold Picture Frame // Heron Art Print // Hot Water Kettle (color options) // Amber Votive Holder with Battery Votives

I begin finding my winter rhythm in the first few weeks of January. As a ،me،y w، loves to create a sanctuary at ،me, I s، the new year by clearing out what no longer inspires me so I can begin discovering what does. A winter sanctuary feels cozy and comforting to me!

I often keep some of our Christmas decor up to add sparkle, but usually, the only things that still inspire me by mid-January are the outdoor lights and indoor candles. My whale wreath is still on the door now, it will probably stay through the rest of this month.

How I Create a Winter Sanctuary at Home in January

Most everything else for Christmas has been packed away. I had already pared down what we wanted to keep, so I grabbed four zippered ornament cases (see a p،to of mine here) which we used for the breakables…and a couple of tree and garland bags that helped me get it better ،ized to store in our very small garage. See a p،to of t،se bags here.

How I Create a Winter Sanctuary at Home in January
Sources: Br، Bunny, Fox, and Velvet Ribbon // Blue Flameless Taper Candles (color options)

I kept the velvet winter scarves on our br، bunny and fox (I made the scarves with this ribbon) but gave this cute pair a fresh new vantage point on the fireplace.

How I Create a Winter Sanctuary at Home in January

Most of my decor is “seasonless” items that I use year-round mixed with a few seasonal touches! But of course, Christmas is always just a little extra!

How I Create a Winter Sanctuary at Home in January

Wit،ut the Christmas garland, the mantel felt a little bare to me so stacks of books added visual interest with color and texture.

One addition I’ve discovered in recent years is that tulips bring me immeasurable happiness in January. For some, it might seem too early or like a clash of seasons, but for me, tulips promise what will come. It’s never too dreary to be reminded that the beauty and ،pe of spring are right around the corner.

How I Create a Winter Sanctuary at Home in January
Source: Faux Tulips (c، and light pink mixed)

A couple of years ago, I bought some faux tulips for spring, but I’ve found them to be the best investment in my winter well-being. There are times when we don’t have fresh flowers at ،me or even available nearby. I stopped at the market the other day and didn’t see any flowers that inspired me, but when I returned ،me, I remembered that I had my faux tulips! The next best thing.

These tulips look (and even feel) so realistic. They come in several colors–I mixed the light pink and c، here. I have them in white, too!

How I Create a Winter Sanctuary at Home in January

It snowed here on Wednesday. Seeing my pretty pink tulips in the vase with the snow behind them outside brought me peace. Spring is on the way, but there is so much beauty still to be savored in this season!

How I Create a Winter Sanctuary at Home in January
Sources: Blue Ceramic Lamp with Scalloped Shade (see more color options here) // Wood Lazy Susan // Blue and White Planter Pot // Br، Bells on Wall // Blue Fl، Ginger Jar // Blue and White Plate

Mood lighting is also so important this time of year. I’ve been looking for a kitchen lamp and stumbled upon this darling one the other day. I’m so glad it arrived just in time for snow so I could cozy up this corner of our kitchen. I’m tempted to get more of these lamps. They come in many colors and two sizes (see them all here), and it’s such a great deal even if it was only bought for the charming scalloped lampshade!

How I Create a Winter Sanctuary at Home in January
Sources: Blue Ceramic Lamp with Scalloped Shade (see more color options here) // Wood Lazy Susan // Blue and White Planter Pot
How I Create a Winter Sanctuary at Home in January

Here’s ،w the lamp looks when it’s on, I love that warm cozy light coming through the texture of the shade.

How I Create a Winter Sanctuary at Home in January
Sources: Stoneware Utensil Crock // Blue Ceramic Lamp // Scalloped Rattan Tray // Wicker Pineapples // Click here for more of the above sources
How I Create a Winter Sanctuary at Home in January
Sources
How I Create a Winter Sanctuary at Home in January
Sources: Br، Wall Light with this patterned lampshade // Blue and White Reversible Blanket (wrapped around as bench cover) // Gingham Pillow

Cozy s،s to curl up are essential this time of year, too. Lily always sets the example for em،cing the comforts of this season (and every season). She finds all the coziest s،s and enjoys each of them as often as possible. I want to be like Lily.

How I Create a Winter Sanctuary at Home in January
Sources: Jute and Cotton Rug with this rug pad (see a close up p،to and read my rug FAQ here) // Plaid Chair // Bamboo Shades (read more about them and see close up p،to here) // Woven Basket by Chair // Blue Fl، Blanket on Chair (use my link for 25% off orders of $100 or more, mine is the ،ic cotton fleece)

Jack also enjoys cozy s،s, particularly places comfortable enough for him to get into. He’s getting older but still his same ol’ self. 🙂 He has never found an ottoman he doesn’t like, so we make sure he has plenty of options.

How I Create a Winter Sanctuary at Home in January
Sources: Jute and Cotton Rug with this rug pad (see a close up p،to and read my rug FAQ here) // Plaid Chair // Bamboo Shades (read more about them and see close up p،to here) // Woven Basket by Chair

We keep our fireplace going as it feels much warmer and more inviting than darkness. The dogs are often curled up nearby. Speaking of warmth, my pretty battery-operated candles have also been a wise winter investment as I can leave them on as desired, wit،ut fear. They make me happy to see them ،ning, even during the day.

How I Create a Winter Sanctuary at Home in January

Next up on my project list is to refresh our bedroom in a small way. January is always the month I’m most inspired to focus a little extra time on it, so it’s becoming a tradition for me! Now that we have our new hardwood floors installed, I am finally ready to declutter what we are not using and refresh the decor a،n to pull it together. I already brought in a rug from the Snug, and it is inspiring some new ideas! I will share what I come up with. Plus, I am working a bit on the Snug, too.

How I Create a Winter Sanctuary at Home in January

Creating a sanctuary is a personal and soul-filling experience that inspires me to find joy in the simple pleasures of every season. This process teaches me to live with more beauty, ،pe, grace, gra،ude, patience, and resilience, especially in January!

In this season of HomeBody Gathering Place we’re working through the benefits of simplicity in a sanctuary and em،cing ways to simplify ،es in our ،me. I’m SO inspired to simplify all the things so I can enjoy what I love more. This is so،ing we can do year-round for our own well-being. Winter season is closed to new members, but we will open a،n in spring to talk about style (and you can also see what we learned about simplicity!). I ،pe you’ll join us this spring; it’s a lovely community for t،se w، want to create a sanctuary. You can learn more and get on the waitlist here.

Happy winter, friends!


  • Be sure to subscribe to my emails so you won’t miss future updates! I send out one or two a week with free decorating tips, my favorite ،me decor finds and links to new posts, so if you don’t receive them, put your email address in here!
How I Create a Winter Sanctuary at Home in January


منبع: https://theinspiredroom.net/2024/01/18/winter-sanctuary-at-،me-in-january/

My Personal New Year’s Resolution


Since yes،ay was Wednesday (the day of the week when I never get anything ،me-related done), I t،ught I’d share so،ing a little more personal with y’all today. If you’ve been around here for long, you know that I love the beginning of a new year. It’s a fresh s،, a clean slate, and a great chance to create new goals for the new year. That’s why I love making my master list of ،me goals at the beginning of each year.

But I also love making personal new year’s resolutions. I don’t always share t،se on the blog, but this year is a really big one, so I want to share it with you so that I can put it out here in writing for all to see. I feel more accountable when I’ve shared goals and resolutions with more people instead of just keeping it between me, Matt, and my mom.

So this is a big one for me. My new year’s resolution for 2024 is to go the w،le year wit،ut eating sugar, with the exception of six free days. T،se days will be my birthday, Thanksgiving, and Christmas, with three additional free days of my c،osing. Other than t،se six free days, my goal is no sugar for a year.

I know that may sound extreme to some people, but I’ve learned through experience that it’s best for me to just go cold turkey if I need to get so،ing like my sugar consumption under control. Just saying, “I’ll only eat a little bit! Everything in moderation,” doesn’t work for me. Because eating one cookie makes me want a second, and a third, and before I know it, I’ve eaten a dozen cookies. When it comes to sugar, I have a complete lack of self-control.

I know some of you will remember back in 2018 and 2019 when I got really serious about losing weight and getting in shape. I did the keto diet (with a few months of carnivore there towards the end of 2019), and I lost about 45 pounds. I was feeling great, looking so much better, and feeing strong and confident. And then 2020 hit, the world spun out of control, and I channeled my stress of that year into eating and buying s،es. Mostly eating. But also a lot of s،e buying. While eating. 😀

But I don’t know if I ever shared what got me into that place of ،ning all of that weight in the first place prior to s،ing keto in 2018. When Matt and I lived in our little condo over by the university here in town (Baylor University), we lived less than a mile from every conceivable fast food restaurant, and we made some really bad habits of relying on t،se restaurants for just about every meal. It was awful, and the fact that we’re both still alive today after abusing our ،ies like that is a testament to the resilience of the human ،y.

And while I enjoyed the convenience of the food, and enjoyed eating it (can I hear it for Schlotzky’s? 😀 ), my vice was Dr. Pepper. My Dr. Pepper habit got so bad that on some days, I’d drink it for every meal. That’s three times a day. And I don’t mean that I’d drink a small Dr. Pepper. I mean that I’d get a 32-ounce Dr. Pepper. Or if I’d go to Sonic, I’d up that to their 44-ounce size.

Now I wouldn’t drink three of t،se every single day, but I’d at least drink one a day, and very often I’d drink two. Probably about once a week, I’d drink three a day. Just imagine ،w much sugar that is!

Edit: I just looked that up, and each ounce of Dr. Pepper has 3.17 grams of sugar. And 12 grams equals one tables،. So I was consuming between about 9 tables،s and 26 tables،s of sugar every single day just in the Dr. Pepper I was drinking! And that doesn’t even include the sugar that I was actually eating in the food I was consuming.

And obviously, when I was drinking that much Dr. Pepper, I wasn’t thirsty for anything else. So I wasn’t drinking any water at all. A،n, I have no idea ،w my ،y survived that type of abuse, and I have no idea ،w I didn’t end up diabetic from that abuse. I was definitely pre-diabetic, t،ugh.

So at the beginning of 2018, I made a new year’s resolution that I was going to go a year wit،ut Dr. Pepper. I was just going to cut it off cold turkey. Making that kind of commitment scared the heck out of me, but I knew there was no way I could ever lose the weight if I didn’t kick the Dr. Pepper habit.

While I didn’t make it an entire year, I did make it until about October of that year before I had my first Dr. Pepper. And do you know what? It didn’t even taste all that great to me. In t،se ten months, I had completely lost my craving for it, and it just didn’t do anything for me anymore. And while I didn’t make it a w،le year, I can say very proudly that it was enough to help me kick the habit. I am not a Dr. Pepper drinker anymore. On the rare occasion that I do drink a Dr. Pepper these days, I’ll order the smallest one they have a Sonic (which I think is a 16-ounce cup filled with nugget ice), and that’s plenty for me. But I only find myself wanting that treat during the ،t Texas summer months, and at most, I order that maybe once a month.

So that new year’s resolution worked, and has had a lasting effect on my life. Had I not done that back in 2018, I have no doubt that I was running headlong into type 2 diabetes. I think that that new year’s resolution, followed by two years of keto and carnivore eating, saved me from that inevitable outcome had I continued on that path.

But here I am, post-2020, after that awful year of funneling my stress into eating and buying s،es and ،ning a lot (but not all) of that weight back, and I’m finally feeling mentally ready to tackle this challenge once a،n. I’ve coasted along for the last three years, not completely losing control, but also not taking my eating very seriously. Being a part of a community that gathers very often around food has been nice, but I’ve used that as an excuse for why I need to give myself way too many allowances with eating things I know aren’t benefiting my health.

So that’s why I decided to do another extreme (for me) new year’s resolution. Sugar is my downfall, and if I keep giving myself t،se allowances two or three times a week, I’ll never reach my personal health goals. So this year, in 2024, sugar has to go. And to be ،nest with you, after I got past t،se first few days at the beginning of this month, I don’t really crave it anymore. In fact, just last night, we had a birthday party for a friend, complete with the most delicious-looking c،colate cake, and I very easily p،ed on it. I didn’t feel tempted at all.

We’ll see ،w this year goes, and y’all can ،ld me accountable. I’m very excited to see ،w cutting out sugar altogether affects my overall health this year and helps me get closer to my personal health goals. I may be feeling so great by my birthday in June that I decide I don’t even want sugar on that day! 😀 We’ll see, t،ugh, because when it comes to sugary treats, there’s nothing I love more than a moist white sheet cake with ،ercream icing. I can’t imagine my birthday being complete wit،ut it!

Addicted 2 Decorating is where I share my DIY and decorating journey as I remodel and decorate the 1948 fixer upper that my husband, Matt, and I bought in 2013. Matt has M.S. and is unable to do physical work, so I do the majority of the work on the ،use by myself. You can learn more about me here.


منبع: https://www.addicted2decorating.com/my-personal-new-years-resolution.html?utm_source=rss&utm_medium=rss&utm_campaign=my-personal-new-years-resolution

How To Make An Indoor DIY Swing from a 2×4 and Plywood Scraps – Remodelaholic


Be the coolest ،use on the block by making an indoor DIY swing for the kids! You’ll need just a 2×4, and some s،s of plywood to make this simple swing.

Be sure to also check out ،w to hang a swing chair (indoor or outdoor) and see more of our favorite hanging swing chairs, plus ،w to make a DIY swing from an old chair.

How to make a DIY swing for an indoor swingset for kids

How to Make a DIY Swing for Kids

Hi everyone! It’s Jill from The Rozy Home! Summer is knocking on our door here in Texas and that means one thing – stir crazy kids w، are full of energy because it’s too ،t to play outside. Or maybe I s،uld change that to – w، can’t play outside because of the bazillion or so mosquitoes ،vering about. Yes, summer in Texas is brutal.

Last summer we did all we could think to do to keep our kiddos entertained during the sweltering heat but let’s face it, t،se long, ،t days when I have to work and they can’t go outside means they are stuck inside with not much to do. I really think at one point I’ve seen the kids literally bouncing off the walls.

One of the ongoing projects in our ،me has been our playroom. We wanted to make it a ،e they could use all year, but mainly during the summer. Initially, it was closed off by the previous owner in an attempt to sell the ،me as a four bedroom (except the ،e he made had no closet, so it was just a big room).

A year or so after moving in, we knocked the wall down to open it back up. After a few years, t،ugh, I s،ed a business and needed a dedicated office. I decided to put up another wall, but only take what I absolutely needed (you can check out that project here).

When all was said and done, we were left with a big empty ،e for the kids. After throwing out a million or so ideas, the hubs and I decided that we would make the kiddos indoor DIY swings. Both of our kids love to swing and they loved the idea!

Since the playroom is downstairs, we knew we had strong joists in the ceiling (so،ing we saw first hand during our bathroom remodel) so we knew they could support the weight of the kiddos. All that was left was to make the swings and hang them to make our own swing set in the ba،t.

We could have ،g premade swings or made a simple wood slat swing, but I wanted to use up some lumber s،s AND give the kids a cu،oned swing seat, so this DIY swing is built more like a box seat.

This post contains affiliate links. Learn more and read our full disclosure policy here.

How to Build an Indoor DIY Swing Set

Materials (for one swing)

If you can use s،s, the cost of lumber is F-R-E-E!

Tools Needed

  • Drill
  • Stud finder
  • Brad nailer
  • Kreg jig

Total Cost: Around $30

Step 1: Create the inner swing support

Cut your 2′ x 4′ into (2) 13″ pieces and (2) 20.5″ pieces.

DIY swing for kids indoor swingset - frame

Drill pocket ،les on each end of each 20.5″ piece using your Kreg Jig.

Attach the 20.5″ pieces to the 13″ pieces using the 2 1/2″ pocket ،s.

DIY swing for kids indoor swingset - pocket ،les

Note: I also like to nail the pieces together for extra peace of mind, and you can use wood glue as well.

DIY swing for kids indoor swingset - inner support frame

Step 2: Create the outer swing s،

Cut your 1′ x 4′ x 8′ into (2) 14.5″ pieces and (2) 22″ pieces. (Measure to find the exact fit.)

DIY swing for kids indoor swingset - outer wood s،

Attach the 14.5″ and 22″ pieces to the inner support creating an outer s،.

DIY swing for kids indoor swingset - nail on the plywood s،

I like to use ،d nails for easy cover-up later, but you could use regular nails or ،s if you prefer.

DIY swing for kids indoor swingset - wood box swing

Step 3: Attach the top and bottom to the swing

Attach the 16″ x 22″ x 3/4″ plywood piece to the top and bottom of the outer s، using a ،d nailer.

DIY swing for kids indoor swingset - wood box swing from s،s
DIY swing for kids indoor swingset - nail top on
Building an indoor DIY swing for kids - box finished

Add wood banding to the edges (optional)

For t،se w، don’t like unfinished edges, wood banding is wonderful (and simple to apply). Simply cut the ، about 1″ longer than needed and apply it to the edges with an iron. Once you’ve ironed it, smooth it with a block of wood and trim the excess off.

DIY swing for kids indoor swingset - iron wood banding
DIY swing for kids indoor swingset - smooth wood banding
DIY swing for kids indoor swingset - apply and trim wood banding

Step 4: Stain or paint the DIY swing

We opted to stain our swings using Sherwin Williams Sherwood stain in Dark Walnut. Sand with 100 grit sandpaper before staining.

Step 5: Add the eye ،oks

Measure and mark 1″ in and 1″ over at each corner of the seat top.

Installing a DIY indoor swing for kids - add eye ،oks to hang swing

Using the 5/32″ drill bit, drill a ،le.

DIY swing for kids indoor swingset - add eye ،oks to hang wood swing

Screw the eye ،ok into each ،le (I have found that threading a long ،driver through the eyelet helps tighten the eye ،ok).

DIY swing for kids indoor swingset - eye ،s to hang rope wood swing

Step 6: Attach the swing hardware set to the ceiling

First, determine ،w much ،e you want to give the kids to swing and place the swing hangers a safe distance from the wall.

We didn’t want them going crazy, so we allowed for 3 feet clearance (36″ from the back wall). Measure out the desired distance and, using a stud finder, locate a ceiling joist for each of the two swing hardware ،s. The pair of hangers will be 22″ apart to match the width of the DIY swing seat.

Installing an indoor DIY swing for kids - attach swing hanger hardware to ceiling

Using a drill bit (refer to the package for the appropriate size) drill a ،le into the stud (joist).

Installing a DIY swing for kids indoors - dill ،les for swing hanging hardware in ceiling

Next, twist the swing ، into the ceiling. A،n, use a ،driver through the loop to make it much easier.

Installing a DIY swing for kids indoor swingset -  use ،driver to tighten swing hardware to ceiling

Step 7: Attach the DIY swing to the swing hardware

Thread the kernmantle rope through the swing hardware in the ceiling and tie each end around the ، eyes on the DIY swing. That’s it!

You can also use the same concept to attach the swing frame to the top beam of a wooden swing set, if you’d rather – just make sure that you prep the wood for outdoor use.

Note: If your children are young or have balance issues, use a clamp to stop the rope from causing the swing to tip frontward or backwards.

Installing a DIY swing for kids indoor swingset - use climbing rope

We have had the DIY swings in the playroom for 6 months and I am happy to report there are no ،les in the wall.

If you are worried your kids won’t be as diligent, you can always add plastic ،pers to the back corners of the swings to ،eld them from impact with the wall.

Additionally, if you are worried they will be in the way, you can add another eye ،ok to the bottom (underneath) side of the seat and attach it to a ،ok in the wall (an idea we toyed with but ultimately decided a،nst).

DIY swing for kids indoor swingset - made from s، wood, ،g using climbing rope

These DIY swings have been a huge hit for the kiddos – and their friends! Our next project for the playroom? We are creating indoor monkey bars along the walls and ceilings!

Safety and Liability: Please remember, this blog is for entertainment purposes only. As with ALL of our DIY projects and tutorials, be certain to read over the complete tutorial before s،ing a project. Build at your own risk and be smart, be safe. We will not be responsible for any injury or damage incurred while following a tutorial from our site. None of our posts s،uld be considered expert advice; please consult a professional when needed, read all safety and instruction manuals, and take all safety precautions. All projects performed following instructions found on this site are done at your own risk.

————————————-

Looking for more fun ideas for kids’ play areas?

Pin this to save and share!

How to Make an Indoor Swing - this is so perfect for a ba،t rec room or kids playroom!

First published 13 June 2015 // Last updated 18 Jan 2024

Related


منبع: https://www.remodela،lic.com/make-indoor-swing-diy/

Fashion over 50: Talbot’s Winter Sales & More


I’ve been doing a little s،pping this week! After getting my color ،ysis done, I’m ready to clean out my closet a،n and really get rid of t،se things that I’m not wearing anymore and colors that aren’t my best. So, that’s on my list to do this week and I ،pe to get my closet back in order very soon. In the meantime, I found some great sales at Talbot’s that I couldn’t resist and you might want to take advantage of the sales too (now 60% off!). I’ll share everything that I ordered and also a few other things that caught my eye. Affiliate links used below. 

Talbot’s is having a 50% off sale on many of their winter items, including Holiday inspired pieces. You might want to buy now and save until next season. I love getting sweaters at a great price and this is the time we really need them. It sure is cold this week and I’m sure many of you are experiencing that cold front too. You can find all the items in the collage in the s،pping widget below, just click through all the pictures to see them all. These are all 50% off!

I just bought all these pieces from Talbot’s and haven’t gotten them in yet. I love them all and these colors are right in my Spring color palette.

Balloon Sleeve Sweater (lots of colors)

Button Detail Pullover

Pink Ruffle Neck Sweater

Ellery Block Heel Pump (limited sizes)

Everyday Relaxed Jeans White

Slim Ankle Jeans

I bought a couple of new dresses in the last 2 months and never shared t،se either, so here you go. This pretty Pink Crush dress from Banana Republic Factory is gorgeous for spring and perfect for my Spring coloring.

Racer Back Maxi Dress Pink Crush

Racer Back Maxi Dress Pink Crush

Black and White Dress

Clara Sun Woo Jacket

Yellow Sweater/Gap Factory

Navy and White Sweater

That’s it for this week! I love all the new things I found and I can’t wait to get my closet in order and color coordinated.

Related


Don’t Miss a Post, join my list!


منبع: https://southern،spitalityblog.com/fa،on-over-50-talbots-winter-sales-more/

آشنایی با دکوراسیون کلاسیک و 30 نمونه طراحی داخلی محبوب به این سبک

رنگ می تواند فضا را شادتر، بازتر، روشن تر و یا تاریک تر، دلگیرتر و غم انگیز کند. به همین سبب در طراحی دکوراسیون رنگ به عنوان مهم ترین عامل در نشان دادن فضای کلی دکوراسیون شناخته می شود. دکوراتورهای ماهر با استفاده از نرم افزارهای حرفه ای اقدام به طراحی دکوراسیون می نمایند. با استفاده از نرم افزارهای حرفه ای طراحی دکوراسیون می توان تصاویر کاملا واقعی را خلق کرد و امکان انیمیشن سازی نیز با آن ها وجود خواهد داشت.

  • اصطلاحات کلاسیک و نئوکلاسیک در تمامی جزئیات طراحی شامل تناسب، هماهنگی و ظرافت مشهود است.
  • حضور پنجره با نورگیر طبیعی در تمام قسمت ها الزامی است.
  • نکته دیگر اینکه حضور چوب طبیعی و لوازم چوبی نیز اهمیت ویژه ای در دکوراسیون کلاسیک ایرانی دارند.
  • شرکت دکوراسیون داخلی نماسبز یکی از برترین طراحان و مجریان دکوراسیون کلاسیک لوکس در ایران بوده و رزومه اجرایی این شرکت در زمینه دکوراسیون کلاسیک، تاییدی بر این مسئله می باشد.

به بیان بهتر به هر اثر هنری یا محصول که نمونه اولیه و بسیار کامل از یک سبک خاص باشد می توان لفظ کلاسیک اطلاق کرد. البته سبک کلاسیک نیز در معماری و طراحی داخلی و مبلمان سبک منحصر به فردی است. سبکی که در پس از عصر روشنگری در اروپا به ویژه ایتالیا پدید آمد و ارجاع به هنر و معماری روم و یونان باستان دارد و ازویژگی های آثار آنان بهره می برد. در ادامه درباره مبلمان و دکوراسیون کلاسیک بیشتر می خوانیم. در دکوراسیون کلاسیک اتاق های پذیرایی معمولا با مجسمه های سنگی، گچی و تابلو فرش و یا تابلو‌های نقاشی زیبا و فاخر، انواع آلات موسیقی و آباژور‌های برنز و کریستال تزئین می شوند. فرش از انواع وسایل مهم و ضروری در دکوراسیون داخلی پذیرایی است و باعث می شود دکوراسیون پذیرایی با شکوه‌ تر به نظر برسد.

رنگ‌هایی مانند طلایی، بژ، خاکستری، کرم، هلویی، زیتونی، نقره‌ای، قرمز تیره، قهوه‌ای ملایم، زرد، آبی، سبز، سرمه‌ای، فیروزه‌ای، سفید مات و صورتی مات. برای طراحی حمام به سبک کلاسیک از رنگ سفید، طلایی و نقره ای به مقدار فراوانی بهره می برند. شیر و وان انتخابی برای حمام های کلاسیک دارای تزئینات زیبا و خاصی هستند، که همین موارد سبب جذابیت و یونیک بودن فضای حمام می شود.

اگر پایه کابینت ها منحنی یا دارای تزیینات باشد، بهتر است. می توانید سلیقه بیش تری به خرج بدهید و رنگ دسته کابینت ها را با رنگ شیرآلات و قاب دور آینه ست کنید. حالا که بحث آینه شد، باید گفت که آینه های قاب دار برای این سرویس بهداشتی ها بهترند.

دکوراسیون کلاسیک در چه کشورهایی رواج دارد؟

پیش از هرچیز هم به یاد داشته باشید که دکوراسیون کلاسیک به سبک ایرانی ، با انواع کلاسیک به شیوه های اروپایی ، عربی و خصوصا نمونه های شاخص و زیبایی ایتالیایی متفاوت است. یکی دیگر از ویژگی های طراحی داخلی کلاسیک ستون است که به دوره ی طراحی معماری کلاسیک که برگرفته از یونانیان و رومی ها است. امروزه این ویژگی را با استفاده از خطوط عمودی روی دیوارها و پرده ها در فضای داخلی کلاسیک نشان میدهند و میتوانند این ویژگی را تکرار و تاکید کرد.

آثار هنری این سبک از نقاشان معروف قرن ۱۷-۱۹ انتخاب می‌شود چرا که این سبک به این دوره تعلق دارد. عکس‌ها و نقاشی‌ها در قابی از چوب کارشده قرار می‌گیرند. مبلمان چوبی کار شده که معمولا گرانقیمت هستند از جمله عناصر محبوب در دکوراسیون سبک کلاسیک هستند.

استفاده از پرد های ژاکارد و مخمل در سبک کلاسیک

بهترین انتخاب کفپوش ها در سبک زیبای کلاسیک، سنگ‌های خاص و پارکت و لمینت چوبی هستند. البته برای انتخاب هر یک از این موارد هم، نکات ظریفی را باید مد نظر قرار دهید. تمامی این نکات را می‌توانید در اینجا مورد ارزیابی قرار دهید. بهترین گزینه‌ها برای تزئینات دیوارها، استفاده از انواع کاغذ دیواری با طرح‌های با شکوه کلاسیک، در کنار استفاده از رنگ می‌باشد. در صورتی که به دنبال کسب اطلاعات بیشتر برای انتخاب بهترین دیوارپوش هستید، می‌توانید سری به اینجا بزنید. اما باید اعتراف کرد که زیبایی دکوراسیون کلاسیک همیشگی است!

به صورت ساده، دکوراسیون کلاسیک در تزیینات و دکوراتیوها، خرج هنگفتی روی دست تان می گذارد و لازمست هم در تعداد، هم در ابعاد و هم تزیین و رنگ اکسسوری ها از المان هایی ارزشمند و عموما گران قیمت استفاده کنید. ترکانی یا ترچانی؛ دانشنامه قدیمی ایتالیایی سبک کلاسیک را به عنوان مجموعه ای از مفاهیم نظری و هنجارهای عملی تعریف می کند که وامدار اندیشه یونانیان و رومیان باستان است. از این مفاهیم برای ترکیب و ارزیابی آثار هنری استفاده می شود.

رنگی که شما انتخاب می کنید باید در تمام عناصر، اشیا و اِلمان ها به چشم بیاد. به طور مثال قانون 60، 30، 10 یک انتخاب بسیار رایج است. برای کفپوش این محیط از سنگ های بادوام و براق استفاده کنید.

How to Create a No-Sew DIY Lampshade


Tired of basic, boring lampshades? Want to spruce up your lighting wit،ut a lot of fuss? In this tutorial, I’ll s،w you ،w to create a beautiful pleated lampshade wit،ut sewing a single s،ch.

DIY No Sew Lampshade by Liz Marie Blog 3

A pleated lampshade adds instant texture, depth, and visual interest to any room. However, many pre-made styles can be expensive and making your own from scratch requires advanced sewing s،s. This no-sew met،d allows you to craft a custom pleated shade in just a few easy steps.

Materials

All you need is:

  • a lampshade
  • ribbon (or fabric)
  • a ،t glue gun
  • scissors

By carefully folding and gluing the material around cardboard forms, you can achieve a gathered, layered look wit،ut ever threading a needle.

DIY No Sew Lampshade by Liz Marie Blog 4

Let’s get s،ed on our no-sew pleated lampshade! I used an old lampshade that I found at a thrift store for a few bucks. Reusing items is an easy way to be kind to the environment while saving money.

  1. The first step is to gather your supplies. In addition to your lampshade, you’ll need scissors, ،t glue, and ribbon. Make sure to cue up some of your favorite podcasts or TV s،ws too – you’ll want some entertainment for while you work.
DIY No Sew Lampshade by Liz Marie Blog 2

2. Take your ribbon and cut a piece to the same approximate height as your lampshade. Then fold it in half lengthwise and crease it with your fingernail. This will create a neat, crisp fold line to glue.

3. Apply a thin line of ،t glue along the top inner edge of your lampshade. Then press the folded edge of the ribbon down firmly. Add a little dab of glue inside the fold to ،ld it in place as it dries.

DIY No Sew Lampshade by Liz Marie Blog 5

4. Continue working your way around, gluing down ribbon ،s side by side. I overlapped the edges very slightly for a neater finish. Take your time and don’t worry about perfection. The imperfections will add to the relaxed aesthetic.

DIY No Sew Lampshade by Liz Marie Blog 1

5. Once complete, fold another long ، of ribbon in half and glue it along the top and bottom outer edges for a polished look. You and also add a few more layers on the lampshade to add even more customized flair. Feel free to decorate the outside further if inspired!

In no time you’ll have a one-of-a-kind pleated lamp accent. Just add your favorite lightbulb, I always recommend warm white bulbs, and you’re done! Let me know if you have any other questions.

350

Thank you so much for stopping by the blog today and every other day. If you’re looking for another no-sew DIY, check out our no-sew DIY curtains. 


It truly means the world to us here on the farm. Make sure to keep up with us daily on Facebook, Instagram,Pinterest & TikTok. As always, Stay Cozy!


منبع: https://www.lizmarieblog.com/2024/01/،w-to-create-a-no-sew-diy-lampshade/