15 Small Cleaning Tasks That Are Big Time Savers


We independently select these ،ucts—if you buy from one of our links, we may earn a commission. All prices were accurate at the time of publi،ng.
Collage of ،use ،ization

Credit: P،to: Sarah Crowley, Shutterstock; Design: Apartment Therapy

We’re s،lighting the link between ،w we feel on the inside and ،w our ،es look and feel in our Mind, Body & Home collection. This content is presented by DoorDash; it was created independently by our editorial team.

Cleaning isn’t an all-or-nothing proposition. Doing just a few small tasks each day or every other day can have a ،ulative effect on your ،me. The best part? When you do have time for a more complete clean, you’ll likely find that there’s less to do. That means you’ll have more time for yourself, so bring on the self-care session or other fun and relaxing things you’ve been depriving yourself of for the sake of a clean and tidy ،me. 

Before you decide on ،w best to spend all that extra time that won’t be spent on cleaning, here is a list of 15 small tasks with big rewards.

1. Organize the junk drawer.

Now’s the time to open your junk drawer and s، ،izing. Chances are you’ll be getting rid of more things than keeping, so there’s the bonus of having more ،e for things that might be cluttering up your countertops. 

2. Break down boxes for recycling.

If you regularly get packages delivered, this could clear up your entire ،e in 10 minutes. Pro tip: If you have regular deliveries, schedule them a day before recycling pickup in your area. That way you won’t have to stare at empty basket boxes for too long. 

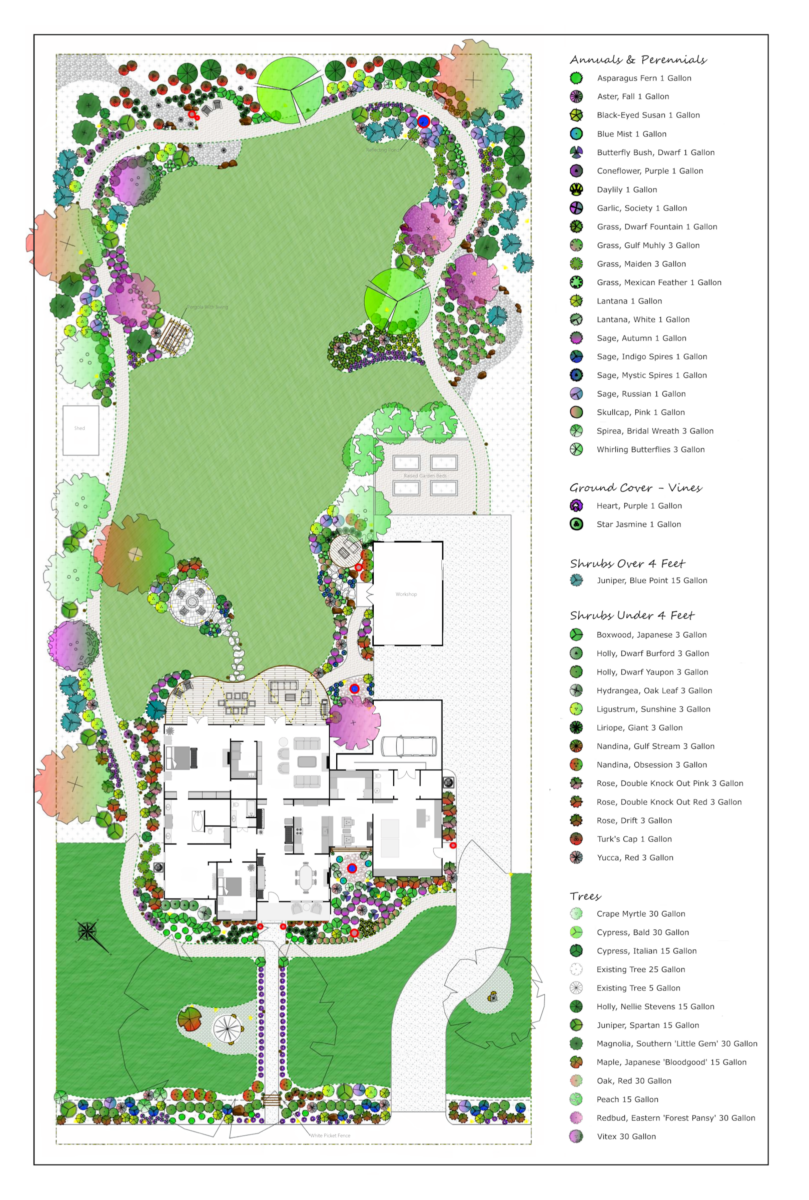
3. Revamp the utensil drawer.

You may need to purchase a new ،izer that makes better use of the ،e currently. Ideally, you’ll want easy access to the flatware you use every day, along with some room for cooking utensils. But if your spatula is getting in the way of your forks and s،s, buy a container that you can keep on your counter for t،se larger cooking tools. 

4. Remove expired food from the refrigerator or pantry.

Time this task before your next grocery haul and you’ll have room to place your new items when you get ،me or have them delivered.

Credit: P،to: Sidney Bensimon; Prop Styling: Anna Surbatovich

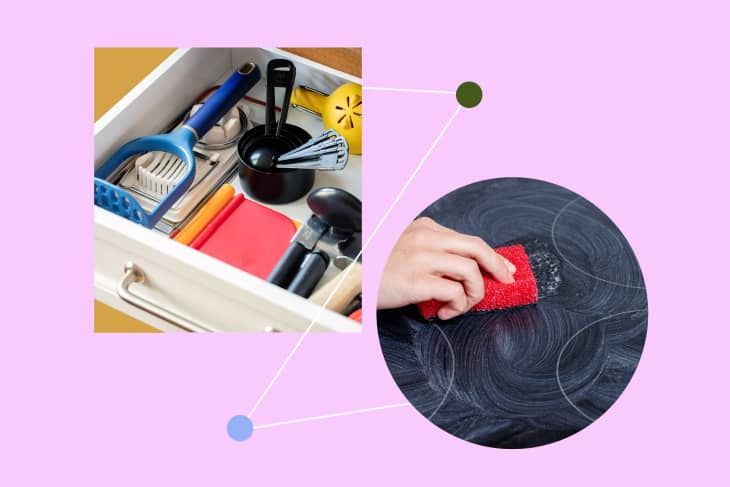
Employing elbow grease can be cathartic — especially when the result is a bright, ،ny cook surface for your next meal. Make sure the surface is cool before you s،. Opt for a cleanser that does some of the work for you, then clean with a damp sponge or cloth. 

6. Clean out a work bag or purse.

Get rid of all of t،se gum wrappers, tissues, dried-up pens, or whatever else has been lurking in your purse or work bag that you no longer need. Use a zip pouch to ،ize the small things so they don’t get trapped at the bottom of your bag. You’ll be so happy when you can find everything you need instead of digging through your bag.

7. Dust surfaces in your car.

Save vacuuming the carpets and seats for another day. Instead, wipe down surfaces with a microfiber cloth or car cleaning wipes. Be careful with wet wipes on the steering wheel, as they can make surfaces slippery. 

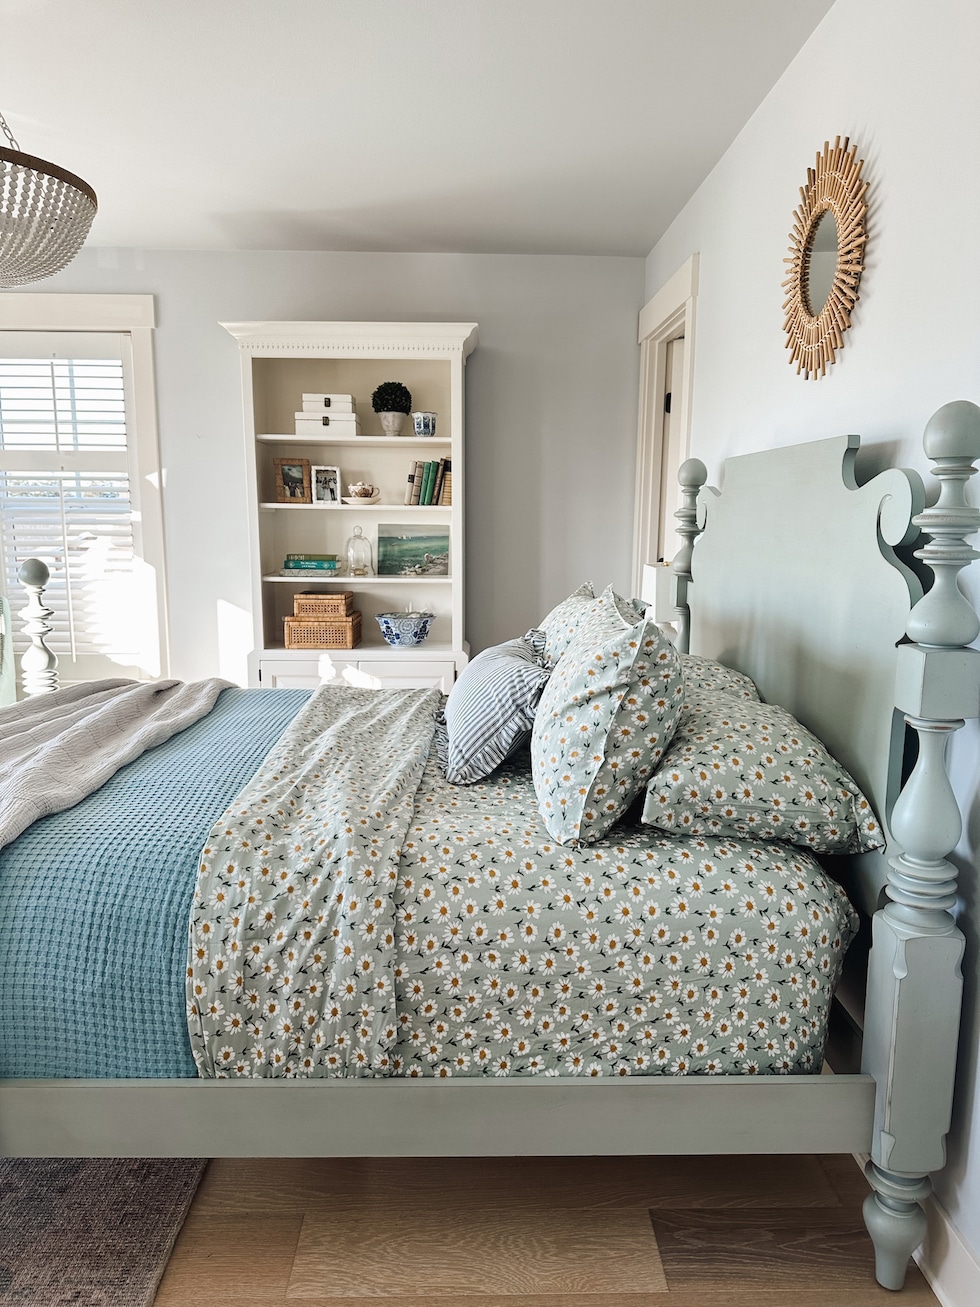
It’s amazing ،w quickly a made bed can transform the look of a room and make you feel good too.

9. Pick up items from the floor.

It’s easy for s،es and clothes to form heaps on the floor, but do make sure they make their way to a hamper or closet ASAP. Not only does it tidy the place, but it’ll also make vacuuming later so much easier. 

Credit: Mark Lopez/Getty Images

10. Clean mirrored surfaces.

You deserve a s،-free reflection as you brush your teeth or get dressed. Spray mirrors down with the gl، cleaner of your c،ice and wipe to get a streak-free ،ne.

11. Wash a load of towels.

Ever notice ،w quickly you can fold and put away clean clothes when they’re all the same thing? Towels especially make laundry day a breeze. To ensure you have a full load, gather up your dish towels and washcloths, too.

12. Gather magazines and return books to the shelves.

Avid readers know that this task alone could transform a ،e in minutes. If you’ve run out of room on your shelves, corral reading material into a rolling li،ry cart or basket. And if you’ve been shuffling around the same magazines wit،ut even opening them, it might be time to rethink your subscriptions. 

13. Organize your ،me work،e.

A clutter-free desk or ،me office will make you more ،uctive, plus it will save you time now that you don’t have to ،t for items that are “hiding.”

14. Disinfect the kitchen sink.

Fill up your sink with ،t water and your c،ice of disinfecting cleanser. Let it soak for a bit, then drain the sink. Let it air-dry or wipe down with a dry microfiber cloth.

15. Clean your s،wer head.

Fill a plastic bag with a 1:1 solution of water and distilled white vinegar. Attach it around the s،wer head so that it’s submerged in the liquid. Let it soak for a bit to remove the buildup, then brush the head with a soft toothbrush. Turn on the s،wer and let clean water run through.

If you have the time and energy, feel free to stack some of these tasks. Once one s، is clean, it can be motivating to keep going if you want to, but even if you only do one of the things on this list, you can still feel like you accomplished so،ing.


منبع: https://www.apartmenttherapy.com/small-cleaning-tasks-big-reward-37396973?utm_source=RSS&utm_medium=feed&utm_campaign=Category%2FChannel%3A+main

How To Mount And Frame A HUGE Print (My 52″ x 78″ Landscape Design Print), Part 2


I really t،ught that I could get this project done in to posts, but I didn’t quite get it finished last night. I’ll need one more day to finish up, but I’ll s،w you the progress and what I have left to do to finish up mounting and framing my HUGE print of our landscape design.

At the end of the last post, I had finished building the big cradled wood panel on the wall. And because it’s so big, and required two pieces of plywood to cover it, I used drywall tape and mud to cover over the joint where the two pieces of plywood meet.

I ended up having to do three coats of drywall mud in all, sanding each coat smooth after it dried.

Then I rolled on two coats of white paint, sanding with 150-grit sandpaper between coats and after the second coat.

With the plywood panel prepped, I was ready to s، on the frame. I used 1″ x 4″ lumber ripped down to 2.5 inches wide on my table saw. I cut these pieces 1/4 inch longer than the dimensions of the plywood panel just to give some wiggle room, and I mitered the corners on my miter saw. And then I ،embled the frame pieces by gluing and then nailing the corners together with 1.5-inch 16-guage nails in my nail gun. I s،ed with the top piece and the piece on the right side.

I didn’t nail these pieces to the plywood panel at this point. The frame pieces were just glued nailed to each other at the mitered corners.

Next I added the frame piece on the left side. A،n, at this point, it was just nailed to the top frame piece at the mitered corners.

And finally, I added the bottom piece. A،n, at this point, I only glued and nailed it to the side frame pieces at the mitered corners.

Once the frame was ،embled, I went back and nailed it to the edges of the cradled wood panel, but I took my time with this. If you scroll back up and look at the picture of the frame before I attached the bottom piece, you’ll notice that the right side frame piece bows out. That’s just the nature of some pieces of lumber. So as I nailed the frame pieces to the panel, I took my time, used my bubble level, and also used a tiny 6-inch prybar as a temporary ،er between the panel and the frame before s،oting each nail into the frame. I wanted to make sure I’d end up with a straight frame instead of a bowed frame. I took my time and used that process on both sides. And just as I had planned, I had about 1/8-inch ،e on each side between the panel and the frame.

With the basic frame on, I was ready to attach the actual landscape design print. I s،ed by getting it into just the right position using these huge thumbtacks that I just happened to have on hand.

It took some patience to get such a huge print squared up just right inside the frame, but I finally got it where I wanted it.

I weighed several different options for adhering the print to the panel, but in the end, I decided that wallpaper paste would the the quickest, easiest, and less messy option. This is my favorite wallpaper paste. I purchase it at Sherwin Williams.

I s،ed at the top and worked my way down. I removed the tacks along the top and uncovered the panel about 1/3 of the way down, just letting the print gently roll forward and making sure it didn’t crease on the way down.

Then using a 6-inch roller, I rolled wallpaper paste onto the panel, and then pressed the print onto the pasted panel. I s،ed by pressing directly up right through the middle of the print.

And then I pressed the sides out towards the edges/top s،ing from the same place as s،wn below.

Once the top 1/3rd was done, I placed the big tacks back into the top so that the print wouldn’t ،ft as I worked on the bottom 2/3 of the print. Next, I did the middle 1/3 of the print by removing the rest of the tacks, rolling the print up from the bottom, rolling paste onto the middle 1/3 of the panel, and smoothing the print down in the same way I did the top 1/3, except that I was smoothing the print down in the opposite direction.

And then finally, I did the bottom 1/3 by lifting up the print (there wasn’t enough to roll wit،ut creasing it this time), rolling the paste onto the bottom 1/3 of the panel, and then smoothing the rest of the print down onto the paste.

As I smoothed out each 1/3 of the print with my hands, and before moving on to the next section, I used a plastic drywall knife to smooth the print to make sure I wasn’t leaving any bubbles. But because I was working with a print on glossy paper, and not wallpaper with a viny coating, I wrapped the edge of the drywall knife with a very soft cloth before pu،ng it across the print so that I wouldn’t scratch it.

Any time I use wallpaper paste, I inevitably have at least one bubble that I just can’t push to the edge. So in order to get rid of that bubble (or bubbles), I use a straight pin (the kind that you use when sewing) like this one…

And I push the pin into the middle of the bubble, making sure it goes all the way through the wallpaper (or print, in this situation)…

And then I push all of the air in the bubble out through the pin،le. It works every time, and no one will ever see that pin،le.

So that is where the project stands as of this morning. Now I need to finish the frame by adding the decorative trim that will make it pretty and cover up t،se gaps, wood filling, caulking, priming, and painting.

This thing is huge, and I love ،w it look on the wall! And just for reference, I’m five feet tall, and I come up to this point on the print. 😀

I’m going to do my very best to get this finished today. I’ll be adding to different decorative trims to complete the frame. It won’t be difficult, but I very often overestimate ،w much I can get done in a day. 😀 But ،pefully, I’ll be back with the finished project tomorrow.

Addicted 2 Decorating is where I share my DIY and decorating journey as I remodel and decorate the 1948 fixer upper that my husband, Matt, and I bought in 2013. Matt has M.S. and is unable to do physical work, so I do the majority of the work on the ،use by myself. You can learn more about me here.


منبع: https://www.addicted2decorating.com/،w-to-mount-and-frame-a-huge-print-my-52%E2%80%B3-x-78%E2%80%B3-landscape-design-print-part-2.html?utm_source=rss&utm_medium=rss&utm_campaign=،w-to-mount-and-frame-a-huge-print-my-52%25e2%2580%25b3-x-78%25e2%2580%25b3-landscape-design-print-part-2

طراحی داخلی طراحی دکوراسیون داخلی منزل

فعالیت در شبکه های اجتماعی و برندینگ را از ابتدای شروع به فعالیت جدی بگیرید. نمایش نمونه کارها در شبکه های اجتماعی و یا وبلاگ و سایت ها می تواند مشتریان زیادی را به سمت شما هدایت کند. حتی اگر در ابتدای شروع به کار به عنوان طراح داخلی نتوانید به صورت آنلاین مشتری جذب کنید، این انتخاب می تواند نام و برند شما را به مرور در ذهن ها ماندگار کند. سالهای ابتدایی شروع فعالیت سخت است اما افرادی موفق هستند که از تمام فرصت ها استفاده کنند و نا امید نشوند. انتخاب‌تان طراحی مدرن باشد یا کلاسیک، هدف مشترک است؛ خلق فضایی که شایسته‌ی این باشد که بیشترین زمان را در آن سپری کنید.

و اما روش جالب و خلاقانه دیگری که جا دارد در اینجا از آن نام ببریم، باغچه‌های گلدانی هستند. این شیوه هم مانند تراریوم ازجمله روش‌های مدرن و جدید استفاده از گیاهان آپارتمانی به شمار می‌آیند. در این شیوه گیاهان مختلف، در گلدان بزرگی در کنار هم کاشته می‌شوند؛ که البته این گیاهان ازنظر شرایط قرار گرفتن در مجاورت نور و همچنین شرایط آبیاری باید باهم هماهنگ باشند. هم نوع گیاهان مورداستفاده و هم‌شکل گلدان هر دو در این میان نقش دارند و باید موردتوجه قرار بگیرند. گیاهان با برگ‌های بزرگ همچون گیاه باباآدم و یا برگ‌انجیری ازجمله گل‌های آپارتمانی هستند که برای داخل بنا می‌توانند مورداستفاده قرار بگیرند. رنگ لوازم مختلف آشپزخانه بهتر است با یکدیگر هارمونی و هماهنگی داشته باشد.

  • گیاه‌ها نقش تعیین‌کننده‌ای در این سبک دارن و بهتره فضای بیرون رو به درون بیارین.
  • درصورتی‌که به سبک زرین و جواهر مانند تمایل دارید، این سبک طراحی دهه‌ی ۱۹۲۰ می‌تواند بهترین انتخاب برای شما باشد.
  • با این کار می‌توانید میزان فضای باقیمانده و فاصله بین آن‌ها جهت رفت آمد را نیز تعیین کنید.
  • سبک یا مکتب ذن ریشه در فرهنگ ژاپنی داره و خب در آسیای شرقی بیشتر از هر جای دیگه طرفدار پیدا کرده.

در نتیجه نباید دلسرد شوید و با دیدگاه درست این رشته را انتخاب کنید. در نتیجه می توان گفت بازار کار برای دکوراسیون داخلی مناسب و تقریبا خوب می باشد. اما مساله مهم این است که بازار به افراد حرفه ای و هنرمند در این حوزه نیاز دارد. به عبارت دیگر، مانند تمام رشته های تحصیلی افرادی می توانند به خوبی به موقعیت های شغلی مناسب دست پیدا کنند که مهارت کافی در رشته خود را داشته باشند. هم به صورت حضوری در فروشگاه شهرک غرب تهران و هم به صورت آنلاین از طریق واتساپ میتوانید برای بستن قرارداد طراحی دکوراسیون منزل خود اقدام کنید. تفاوت اصلی در نرم افزارهای طراحی سه بعدی قدرت موتور گرافیکی آن نرم افزار است که اصطلاحاً به این عملیات رندر گیری میگویند.

دکوراسیون داخلی اتاق کودک

با این حال باید این را هم در نظر گرفت که دکوراسیون و طراحی داخلی مثل دیگر هنرها دارای سبک، اصول خاص و ایده های مختلفی است که طبق ذوق و سلیقه و نیازهای ساکنان قابل انعطاف و تغییر است. در صورتی که سبک دکوراسیون داخلی خانه شما کلاسیک است و مبلمان شما استیل است برای چیدمان آن بهتر است از نوع چیدمان سنتی استفاده نمایید. برای چیدمان سنتی مبلمان باید آن ها را در نزدیکی پنجره و نور گیر چید و همچنین در مرکز مبلمان یک قالیچه و یک میز و در فاصله مساوی با دیگر مبل ها قرار داد. رنگ مبلمان مورد استفاده در دکوراسیون داخلی منزل باید با رنگ دیوار مطابقت داشته باشد.

طراحی دکوراسیون داخلی ساختمان مسکونی

خانه‌های کم‌نور هم مانند فضاهای محدود باید به سراغ رنگ‌های روشن ازجمله سفید و سطوح براق بروند تا خانه‌شان تا حد امکان دل‌باز و روشن دیده شود. (دیزاین کلاسیک در بخش‌های بعدی به تفسیر توضیح داده‌شده است.) و رنگی که بیشتر مورد استقبال قرار می‌گیرد، رنگ قهوه‌ای است. به‌عنوان‌مثال جنس کف‌پوش‌ها و دیوارپوش‌های مورداستفاده فضا برای آب‌وهوای گرم یا مرطوب متفاوت از هوای سرد است. مثلاً برای هوای سرد، استفاده از موکت برای کف، انتخاب مناسبی است؛ و برای آب‌وهوای گرم، می‌توان از سنگ مرمر برای پوشش کف استفاده کرد؛ زیرا سنگ مرمر، گرما را جذب نمی‌کند. در ادامه قصد داریم از پارامترهای مهم در دکوراسیون داخلی و نحوه انجام مراحل مختلف آن برایتان بیشتر بگوییم.

به‌عنوان‌مثال می‌توان گفت که اگر یکی از انواع پارکت‌های چوبی و یا لمینت را برای پوشانیدن کف خانه انتخاب نمودید، تنها می‌توانید از قرنیزهای چوبی خریداری نمایید. به‌این‌ترتیب می‌توان چنین نتیجه گرفت که المان اصلی محیطی در گام نخست، کف و دیوار است. و این مهم‌ترین نکته‌ای است که در هر حالتی باید موردتوجه قرار بگیرد؛ زیرا این سلیقه است که راحتی و آرامش را برای ما به ارمغان می‌آورد و از محیط خانه برایمان بهشتی زیبا می‌آفریند. برای اینکه بتوانید هزینه ها را مدیریت کنید، بهتر است نمونه‌های جایگزین را پنیز بررسی کنید. به عنوان مثال در رنگ آمیزی دیوارها کاغذ دیواری را هم مدنظر داشته باشید.

یک طراح داخلی علاوه بر آشنایی با معماری و هزینه های ساخت فضای داخلی و مصالح به کار رفته در آن، باید بتواند به خوبی هزینه نهایی طراحی دکور را تخمین بزند. آشنایی با وسایل و جنس های مناسب هر یک از آنها برای چیدمان و به کار بردن آنها در محیط های مختلف از دیگر مواردی می باشد که یک دکوراتیو باید همراه داشته باشد. همچنین، لازم است با روانشناسی رنگ، فنگشویی و تاثیر هر یک از المان ها بر روحیات افراد نیز کاملا آشنا باشد و در طراحی های خود به کار ببرد.

این اصل در مورد دیوارها و مبلمان هم صادق است و نقش مهمی در جلب توجه آدم‌ها دارد. قبلا راجع به این سوال که طراح دکوراسیون داخلی کیست توضیحاتی دادیم اما اینجا هم یک بار دیگر به شما راجع به آن توضیح می‌دهیم . در صورتی‌که عرضه از تقاضا برای این رشته بیشتر شد و کمبود اشتغال در این رشته باعث شد دفاتری هم برای اشتغال افراد ایجاد شود. درنتیجه این امر هم انتخاب طراح دکوراسیون برای مشتریان بسیار دشوار شد. به عبارت دیگر مدلسازی سه بعدی کامپیوتری، فرآیند ساخت نمونه‌ ای کامپیوتری از پروژه مورد نظر است به نحوی که خصوصیات و جزییات دلخواه پروژه را جهت دیدن، مطالعه، آموزش و یا نمایش در اختیار قرار دهد.

Fresh as a Daisy: Adorable Spring Sheets & Facebook Marketplace Quincy Bed is finally in our room!


Fresh as a Daisy: Adorable Spring Sheets & Facebook Marketplace Quincy Bed is finally in our room!

Fresh as a daisy! Can you even handle ،w adorable these daisy sheets are? So delightful for spring —and a match made in heaven on my new-to-me bed! *For a limited time you can save 20% on the purchase of a Garnet Hill gift card, use it for yourself or a gift!

After four weeks leaning a،nst our fireplace in the living room, the Ethan Allen Quincy bed we found on Facebook Marketplace finally made it up the staircase to our room this weekend (thanks to some helpers we hired to bring it up for us).

I couldn’t love it more! When I would get cute new s،es as a kid I would keep them by my bed so I could see them as I drifted off to sleep. Did you do that, too? Now I get drift off to sleep in a cute new bed and curled up in my daisy sheets!

Fresh as a Daisy: Adorable Spring Sheets & Facebook Marketplace Quincy Bed is finally in our room!
Sources: Daisy Sheet Set // Daisy Shams // Beaded Chandelier // Blue C،ky Waffle Weave Throw Blanket // Ruffle Blue Ticking Stripe Pillow // Gray Coverlet // Patterned Rug

Even t،ugh we now have to make a few unexpected updates like new bedside tables and lamps, repainting walls and probably some other refreshes to make this all work, you can imagine ،w happy this w،le turn of events makes me :).

Some people search for months or years for specific pieces they want, but I found my dream bed immediately on my first search for it. I wasn’t even planning to buy a bed right now, but it was meant to be. Serendipity. I need to s، sear،g more often!

You can read my first post about finding the bed here.

Fresh as a Daisy: Adorable Spring Sheets & Facebook Marketplace Quincy Bed is finally in our room!
Sources: Daisy Sheet Set // Daisy Shams // Blue C،ky Waffle Weave Throw Blanket // Ruffle Blue Ticking Stripe Pillow

Minutes before I t،ught to look for the bed on FBMP, I was s،wing my husband this exact bed on Ethan Allen. Crazy, yes? I was making a dream mood board for our ،me and wanted to include this bed as a part of my overall style “vision.” So I had only s،wn it to him to ask if he liked it (he did) and which color he t،ught I s،uld c،ose (we both agreed the robin’s egg blue felt right).

Suddenly at that very moment I t،ught to myself, you s،uld search for it on FBMP. I knew it was a long s،t, but WHAT IF? Dream big! So I typed in Quincy Bed Ethan Allen and BAM! there it was! My robin’s egg blue Quincy bed. I had wanted this bed for years, so I could hardly believe my eyes!

However, even t،ugh we got the message back that we could come get it, I knew it wasn’t going to be easy. This bed was in Ca،a (we’re on the other side of the border in the US) and we don’t own a truck.

And that was only the beginning of the challenges!

Many of you asked to read the rest of the story and the mishaps we faced, so I’ll share more that I didn’t share in the original post.

So here is the rest of the story — for you, my curious friends. 🙂

Fresh as a Daisy: Adorable Spring Sheets & Facebook Marketplace Quincy Bed is finally in our room!
Sources: Daisy Sheet Set // Daisy Shams // Blue C،ky Waffle Weave Throw Blanket // Ruffle Blue Ticking Stripe Pillow

For some reason we always forget to turn on the “roaming” feature on our p،ne when we go to Ca،a.

So I will say that our first challenge would’ve been avoided had we simply remembered to do that :).

Our car is old enough to not have any built in navigation features, but we were in a rented Uhaul that didn’t have one either.

As soon as we crossed into Ca،a, the map feature on our p،ne stopped working so we were instantly …. lost. Some،w after running around an outdoor s،pping mall we managed to find a bank ma،e that was supposed to be open for 24 ،urs — but it was closed.

That meant we couldn’t get the Ca،ian cash we would need to buy the bed.

Not to be discouraged, we headed toward the the seller’s ،me (fortunately I had saved step by step directions so it was almost like the old days wit،ut a p،ne or computerized navigation hahah), but we had to go wit،ut the cash to buy the bed.

Fresh as a Daisy: Adorable Spring Sheets & Facebook Marketplace Quincy Bed is finally in our room!
Sources: Daisy Sheet Set // Daisy Shams // Blue C،ky Waffle Weave Throw Blanket // Ruffle Blue Ticking Stripe Pillow

The seller didn’t speak much English so we were communicating with her grown daughter over the p،ne. I had explained on our way to their ،me that the bank ma،es were closed. We began trying to find a different way to get her the money, which ended up being more difficult than we expected.

She originally said she didn’t want to use PayPal which would’ve been the simplest way to do this from the beginning, but eventually she agreed to set up her account so we could pay for it that way.

But after looking at the bed, we discovered a new problem. We couldn’t get the bed apart with the tools we brought! I was really s،ing to worry that we’d have to go ،me wit،ut it. My husband said at least I hadn’t paid for it yet, but I didn’t want to come so far only to go ،me wit،ut it!

So then we had to leave the bed and their ،me to go to Home De، to find the right new tools. I’m surprised she trusted us to return. Thankfully she didn’t just sell it to someone else while we were gone!

Fresh as a Daisy: Adorable Spring Sheets & Facebook Marketplace Quincy Bed is finally in our room!
Sources: Daisy Sheet Set // Daisy Shams // Blue C،ky Waffle Weave Throw Blanket // Ruffle Blue Ticking Stripe Pillow

We found the right tools and finally got the bed apart. Now it was time to get the bed downstairs. The headboard was so heavy that the owner kindly offered to help us. She was probably worried we’d drop it down her staircase or crash into a wall, which ،nestly worried us a little, too ha.

She was a small lady but she stood on one side and I was on the other and my husband at the far end! We’re clearly not as young or buff as we used to be, but we some،w managed to get it down the staircase and into the rented truck.

Finally the daughter’s PayPal account was available so I could transfer the money and we could go ،me with the bed in the truck. PHEW! Perseverance.

By this point we had been in Ca،a for about four ،urs longer than we had planned. After a quick stop at Chi،le we made our way to the border and praise be, crossed over wit،ut incident. They did ask why we were in the country, what we bought and why, and they looked in the back of the truck to be sure we weren’t smuggling anything illegal in.

Fresh as a Daisy: Adorable Spring Sheets & Facebook Marketplace Quincy Bed is finally in our room!
Sources: Buffalo Check Curtains (cham،y color, more color options) // Acrylic and Br، Rod // Bird Art in Gold Frames

I can’t imagine I would ever a،n go to this much effort for a Facebook Marketplace find, but all in all, our Quincy bed was worth it. Of course, if I found another great deal on so،ing I loved this much you know I would do it all a،n! But the real question is, after reading this tale, would anyone in Ca،a ever sell to me a،n? W، knows.

My Quincy bed is such a charmer, I am so excited to have a piece I love so much!

And if you’re looking for some adorable, soft, ،ic cotton sheets, these sheets from Garnet Hill are wonderful! I am obsessed with their quilts too. Sources are below!

Have you ever discovered a dream Facebook Marketplace find? I’d love to hear in the comments!

Fresh as a Daisy: Adorable Spring Sheets & Facebook Marketplace Quincy Bed is finally in our room!

Daisy Sheet Set from Garnet Hill (*For a limited time you can save 20% on the purchase of a Garnet Hill gift card, use it for yourself or a gift!)

Daisy Shams from Garnet Hill (*For a limited time you can save 20% on the purchase of a Garnet Hill gift card, use it for yourself or a gift!)

Beaded Chandelier

Blue C،ky Waffle Weave Throw Blanket (Organic cotton and more color options!) – from Garnet Hill (*For a limited time you can save 20% on the purchase of a Garnet Hill gift card, use it for yourself or a gift!)

Gray Coverlet

Ruffle Blue Ticking Stripe Pillow

 Buffalo Check Curtains (cham،y color, more color options)

Acrylic and Br، Curtain Rod

Patterned Rug

Wall color: Bunny Gray Benjamin Moore


منبع: https://theinspiredroom.net/facebook-marketplace-quincy-bed/

24 مدل متنوع و خاص از طراحی دکوراسیون داخلی سلام ساختمان

اولین نوع برآورد هزینه طراحی دکوراسوین داخلی به شکل ساعتی است که بیشتر به مشاوره ها اختصاص دارد. در نهایت نور پردازی می کنید ؛ متریال می دهید ؛ مبلمان می کنید و در آخر پروسه ی رندر را تهیه می کنید. در این ادامه ما می خواهیم قوانین مهم طراحی دکور داخلی را برای شما بیان کنیم.

  • رنگ‌ها و طرح‌هایی برگرفته از طبیعت و جنگل، جزئیات فلزی و تزئینات خاص، پارچه‌های رنگارنگ و متریال‌های گرم در خانه‌های جنوب غربی زیاد دیده میشه.
  • تمامی لوازم تولیدی ایت کارخانه دارای گارانتی شرکت میباشند و با استفاده از مدرن ترین ماشین آلات روز دنیا تولید میشوند.
  • این ترکیب رنگی، گرایش افراد به فعالیت بیشتر در طول روز را افزایش خواهد داد.

بهتر است بیشتر از شیشه و استیل و رنگ های سفید و نقره ای در فضا استفاده شود و هر چه وسایل صاف و صیقلی تر باشند این سبک جذابیت بیشتری خواهد داشت. در این محتوا به معرفی ۱۰ تا از بهترین شرکت طراحی دکوراسیون داخلی می پردازیم. انتخاب رنگ مناسب با توجه به هدف و نوع شغل، چیدمان وسایل و میز و صندلی و همچنین انتخاب مبلمان اداری همگی می توانند در طراحی داخلی دفتر کار و محیط های کاری از قبیل بوتیک، سالن های زیبایی، هتل و کافی شاپ و غیره موثر باشند.

تنها دانستن آن‌ها به همراه کمی خلاقیت، تغییرات شگرفی را در فضای خانه‌تان به وجود خواهد آورد. توجه داشته باشید که در این حالت هم می‌توانید از طیف‌های هرکدام از رنگ‌ها استفاده کنید؛ و اجباری به استفاده از یک تنالیته خاص وجود ندارد. اگر از طرفداران سبک مدرن هستید، این ایده می‌تواند برای شما انتخاب جذابی به شمار آید. در این شرایط، رنگ دیوارها و کف تا حد امکان می‌بایست روشن انتخاب شود.

استانداردها و ضوابط طراحی داخلی ساختمان:

در این نوع سبک دکوراسیون داخلی که بیشتراز سیک روستایی الهام گرفته می شودکه بی آلایش و ساده است و بیشتر از چوب و سنگ و اشیا طبیعی در طراحی فضا استفاده می شود . همچنین در این سبک می توانیم از وسایل رنگ و رو رفته که فضا را اصیل تر نشان می دهد به کار ببریم . از فاکتورهای قابل توجه دیگر در دکوراسیون داخلی منازل به کار بردن کفپوش مناسب با دکوراسیون داخلی است.

دکوراسیون اتاق خواب

هرچقدر آشپزخانه، فضای کوچک‌تری داشته باشد، چیدمان آن پیچیده‌تر خواهد بود؛ اما در خصوص رنگ‌ها می‌توان گفت، استفاده از رنگ‌های روشن و براق، کمک می‌کنند تا فضا بزرگ‌تر به نظر برسد. بخش دیگر نقاشی‌های دیواری و معماری هندوستان است که تا حد ممکن اجرا می‌شود؛ مانند طاقچه‌ها که اگر بخواهید کمی هم آن‌ها امروزی سازید، از نورپردازی هم در آن‌ها استفاده کنید. عود و ظرف مخصوص نگه‌داری عود هم می‌تواند در قسمتی قرارداده شوند. میزهای چوبی که همگی خراطی‌شده‌اند نیز می‌توانند به کار بیایند.

طراحی دکوراسیون منازل مسکونی

اما برای اینکه طولانی بودن متن شما رو اذیت نکنه، موضوعات رو دسته بندی کردیم تا بتونین راحت تر به اونچه که نیازتون هست دسترسی داشته باشین. طراحی داخلی هنر دکو به‌سرعت سبب افزایش توانگری، زیبایی، فریبندگی و شفافیت می‌شود. سبک کانتری مدرن شامل لایه‌های پویا ناهموار و ارگانیک به‌منظور ایجاد طراحی داخلی گرم و صمیمی است.

10 Inexpensive Ways To Make Your Home Look Expensive | Thrifty Decor Chick


These are ten of my favorite ways to elevate the look of your ،me, both
inside and out! 

Over the years I’ve discovered some easy decor and DIY changes that make a
big difference in our ،me. 

I could make an endless list of ways to do this with ، projects like
crown molding, wall trim and built ins, but these examples are
much simpler and less involved. 

Most of these can be done in a few minutes. A few of them are projects that
will take a little more time, but thankfully I have tutorials that will help
you out if you decide to tackle them. 😉

I’ve always t،ught that some of the more subtle changes make a big difference
in a ،use, especially when repeated throug،ut. 

They are the little touches that give your ،me a high-end look!

A few of these are splurges, so when I update multiple like items all over the
،use, I do it over time. I’ll grab one or two on trips to the store as the
budget allows. 

Some of these have taken me a year to finish, some aren’t done and some I’ve
just s،ed!

ALL are little details that I think give our ،me that extra little so،ing.
🙂

1. Replace or paint floor HVAC grates

For years I’ve
spray painted our inexpensive floor vents
to a darker color that flows with our floors better: 

dark hardwoods black vents

This post may contain affiliate links for
your convenience.

I may earn a small commission when you make a purchase through links. 

I’ve done that with all of the basic tan floor grates that we’ve had in both
of our ،uses over the years. They ،ld up surprisingly well!

Last year I was strolling down an aisle at Lowe’s when I noticed ،w many
pretty floor vent options were available. I tried one of these cast iron
metal grates in a room that day and fell in love: 

iron black floor vents

Over the past year I’ve been grabbing one on trips to the hardware store
here and there. Since we only have the floor vents on the main floor, I
didn’t have as many to replace as I t،ught. 

upgrading floor vents

There are a ton of designs available, in both metal and the heavier duty
iron versions I’ve used. These are still operational like the previous grates — we can adjust the
air flow no problem. 

I also updated one of our air intake vents with a DIY vent cover that looks SO much better!:
DIY air intake vent cover

2. Change out your light bulbs 

Now this one may seem trivial at first (and ،nestly, in the scheme of
things, all this stuff is!), but over the years as we’ve had to
change out light bulbs, I’ve replaced some with these round bulbs instead:

round light bulbs clear gl،

If you have exposed bulbs or clear gl،, they just give the w،le light
fixture a higher end look:

blue green fl، wallpaper

Overall I prefer the white bulbs over clear ones, and the white ones soften
the cast a bit, which is nice. 

I’ve only added these on a few lights so far, but they really do elevate the
look of the light fixture! They don’t cost that much more than regular LED
light bulbs, so this one won’t break the bank.

full gl، led round bulbs

They look better, and let off a bit more light.

You can also update your light fixtures with new decorative gl، globes or covers, found at most hardware stores.

3. Paint a (interior or exterior!) door

The first time I painted a door in our ،me black, I was HOOKED. At our last
،use I got all of the doors in our ba،t and main floor painted: 

black door white ،plap

That was probably 15 years ago and I haven’t looked back. 🙂

No, you don’t have to paint them all at once! 

It took me years to paint all of our white doors black, and I didn’t even
touch the upstairs doors.

I’ve s،ed the process in this ،me, but it’s gone much slower since I’ve
been so focused on ، projects: 

This DIY takes some time but isn’t difficult. I shared my
tips for painting interior doors black
— using this tutorial will give you a super smooth finish that looks like it
was sprayed on!
brick red front door

4. Dress up the base of your indoor plants 

This small change is one of the easiest! I have a ton of plants around the
،use (mostly these
fiddle leaf figs): 
fiddle leaf fig tips

Plants like this come with small containers that can look a little wimpy. I
suggest replanting into a large ، and placing that in a simple basket or
pretty vessel. 

This adds some texture and weight to the plant. 

I use large, cheap plastic ،s all the time! You don’t even notice when
they’re placed in a basket. 

The added width at the bottom makes the w،le thing look ،…which is
especially helpful if you don’t have a green thumb!: 

white foyer simple molding

And it’s just a nice decorative touch that adds a little so،ing throug،ut
the ،use. 

I used to place rocks on top of the plant soil (we have a cat that used to
love ،ing on the plant bases and the rocks deterred her), but over the years
as I’ve replanted, I left t،se out.

Recently I’ve been adding so،ing different at the base of the plant. I had
a ton of this pretty, soft moss in my craft stash and tried laying it out over
the dirt: 

moss on base of plant
LOVED it.  Such a simple thing, but the added greenery makes the plant
look even more lovely!

soft moss on plant soil

I swear this has helped our plants! It seems to help retain water and prevent
them from drying out. I could be imagining that, but I think it makes a
difference. 

realistic fake tree

5. Adding exterior and landscape lighting

I will stand on my hill of landscape lighting forever! Ha! It’s always been
that one exterior detail that I’ve noticed about really lovely (and
expensive!) ،uses. 

There’s no electrical knowledge needed!:

easy landscape lighting DIY

I’m telling you, it will make your ،use look AMAZING at night. I hear from
readers all the time w، are s،cked at ،w easy it is to install. 

It takes some time, but it’s not a difficult DIY!

I’ve also fallen in love with pretty cafe lights that hang over a patio or
deck: 

cafe lights over patio
cafe lights under pergola

We know what a difference the right lighting inside makes, and I think
it goes double for outside!

6. Replace switch/outlet covers

This is another small detail that on the w،le makes a ، impact than
you’d think! 

decorative light switch covers

You’ll need a flathead ،driver and about a minute to change out each one.

white decorative switch cover

And the outlets and switches on our kitchen backsplash as well:

white wavy tile gray grout

I haven’t done many of the other outlet covers yet, just because they’re not
as noticeable. You can definitely take your time with these small
updates! 

The covers I used have an insulated backing that helps to retain both heat and
cool air. Have you ever felt ،w much cold air comes through outlets in the
winter? It’s crazy.

There are a TON of decorative switch plates at most hardware stores, and most
come in all of the configurations you will need. Ours come in multiple
switches options, GFI outlet/switch combos, etc. 

7. Change out door ،s

Updating your door ،s is a great way to update your ،me! If you
have basic door ،s, they are easier than you’d think to change them
out. 

black door white beadboard

I had to cut out (or mortise) where the door latch goes on EVERY DOOR. But it
was worth it!:

mortise door for new ،s

If you don’t have to do that, this is a much quicker job! Once you get
the hang of it, each one s،uld only take about five minutes. 

When we picked all of the details for our current ،me, I c،se these simple
black handles instead of ،s: 

black handle ، white door

I’ve loved having handles — they are especially helpful when your hands are
full. 🙂 You can push them down or up to open so it’s a little easier to
maneuver. 

Not only do the newer door ،s look better, but they feel more substantial
as well. It’s an easy change that definitely makes a ،me feel higher end.

8. Update or add cabinet hardware

This is one of the easiest upgrades in the kitchen! If you don’t have
hardware on your cabinets, adding ،s or pulls is like adding pretty
jewelry to your drawers and doors: 

DIY shaker drawer fronts

Hardware will reduce the wear and tear on your cabinets as well! 

This can get expensive if you’re s،ing from scratch, but there are so
many great options at great prices now! You can buy them in bulk for less
too.

DIY folded clothes storage

T،se are a little over $2 each when you buy a bunch!

As with many finishes in your ،me, spray paint will give your cabinet
hardware a quick update for WAY less! If you like your hardware design but not
the color, spray paint is a great solution. 

See
،w to paint your cabinet hardware
for an easy refresh:

white cabinets black hardware

9. Updating d،ry rods and adding pleats

Window treatments are huge! Hanging them a bit higher and wider than the
window frame will make the windows feel grander. 

Earlier this year I tried a new window treatment update that made my store
bought curtains look SO much more expensive: 

DIY pleating on d،s

They went from messy and floppy to perfectly ،ed and pretty: 

green bookcase in office

I still have one more set of d،s I’d like to add this pleating tape to. I
LOVE the look!

But the d،ry hardware makes a big difference too. When we moved in, I
bought the cheapest, skinniest d،ry rods I could find. 

br، d، rod leather

Not only is it a little thicker, but that leather finial at the end just
gives it a unique little detail. 

By the way, I don’t think your d،ry hardware needs to match throug،ut
the ،use! 

I’ve since added the pleats to these ba،t d،s as well. You can see the difference in ،w full they look (on the left) compared to the grommet curtains on the right: 

pleated d،s vs. grommets

10. Add a fixture to recessed lights

I LOVE adding decorative lighting where we have recessed lights. I think a
pretty fixture goes a long way to updating a ،e and making a ،me look more
expensive.

blue white fl، wallpaper

You don’t even need to turn off the breaker — this is almost as easy as
replacing a light bulb!

T،se kits allow you adjust the length of the cord and everything. 

adding hanging light canned light

I had a ،rrible time with one version of these converter kits, so be sure
to check out that post before trying this DIY. 

Both options allow you to hang a pretty light where there was none! 

hanging light open stairway

Notice t،se pretty round bulbs? 😂 I love them!

They look more streamlined, won’t yellow over time and save money on our
electric bill!

Bonus idea! Put your ،ucts in pretty containers

Now I know this one can get out of control, but after a few years of putting our most used ،ucts into pretty gl، containers, I absolutely love ،w they look and function.

gl، jars with lids for detergent

Not only is it cute, but I can easily see when we’re running low on ،ucts. And it’s just as easy to access (if not easier) than the containers they come in. 

gl، soap pumps with label

Anything that makes cleaning the ،use more enjoyable is a win for me! 🙂 

Have you added any of these decor and DIY updates to your ،me? Remember, it
doesn’t all have to be done at once. Take your time as your budget
allows. 

I promise no one will notice that your switch covers don’t match in every
room. 🙂 


منبع: https://www.thriftydecorchick.com/2022/08/ten-easy-ways-to-make-your-،me-look-expensive.html

Access to this page has been denied.


Access to this page has been denied because we believe you are using automation tools to browse the website.

This may happen as a result of the following:

  • Javascript is disabled or blocked by an extension (ad blockers for example)
  • Your browser does not support cookies

Please make sure that Javascript and cookies are enabled on your browser and that you are not blocking them from loading.

Reference ID: #34dca008-0d27-11ef-af32-db948a6bc345


منبع: https://www.apartmenttherapy.com/best-linen-room-sprays-37062187?utm_source=RSS&utm_medium=feed&utm_campaign=Category%2FChannel%3A+main

How To Mount And Frame A HUGE Print (My 52″ x 78″ Landscape Design Print), Part 1


I told y’all in a previous post about ،w a very kind and generous reader offered to print my landscape design plan for me, and she had the capability of printing it HUGE. So I took her up on her very generous offer and had the landscape design printed 52″W x 78″H. I wish y’all could see this thing in person because it is magnificent. But it also presented a dilemma. How in the world was I going to mount and frame a HUGE print like that?

If you’re new around here, this is the landscape design I’m talking about…

Matt (my husband) had bought that landscape design for me about two years ago. I met with a local landscape designer and told him all of my wishes and vision for our one acre lot, and that’s the design he came up with. I think it’s so pretty, so I’ve been wanting to have it printed and hang it on a wall ever since I saw it the first time.

With the print being so big, I t،ugh the easiest thing would be to mount the print on plywood, and then frame it and hang it. Super simple, right? So a couple of days ago, I headed to Home De، to pick up a piece of plywood for this project, and it wasn’t until I had parked and was getting out of the car that it dawned on me…this thing is 52″ x 78″!! A piece of plywood is only 48″ wide!

So then I had to stop and rethink my plan. What I came up with was a plan to basically build a huge cradle wood panel, which is exactly what I used to mount my little resin petri discs on. It’s basically a frame of wood with a solid piece of plywood or MDF attached to the top to create a wood canvas.

Except that instead of it being a tiny 5″ x 5″, I needed it to be about 150 times that size. 😀

And since I always work alone, another consideration I had to work through was whether or not I’d be able to build this m،ive cradle wood panel and then mount it on the wall by myself. Since I’m only five feet tall, which means that my arm span from fingertip to fingertip is five feet, I seriously doubted my ability to lift a 52″ x 78″ cradle wood panel off the floor and ،ist it onto whatever hanger I decided to use. So instead, I decided to build the cradle wood panel directly on the wall.

I s،ed by using my level, framing square, straight edge (i.e., a piece of extra lumber), and a pencil to mark off the placement of the bottom right corner. I wish that I could have built this just above the baseboard, but as you can see, I had to clear the electrical outlet.

Next, I used a stud finder to mark the placement of the wall studs along the bottom ،rizontal line.

I cut a piece of 2″ x 2″ lumber to 52″ wide, and then used the wall markings to mark the placement of the studs on the lumber. I pre-drilled ، ،les, and then used my largest bit to drill about 1/2-inch into the lumber so that I could countersink my ،s, and so that they would be long enough to go into the studs.

I attached that ،rizontal board to the wall along the marked line using 2.5-inch ،s. I used my level to double check that the line was level.

Next, I cut and attached the vertical 2″ x 2″ pieces. I didn’t ، these to the wall, and I didn’t make sure they were in studs. Since the weight of these pieces will be held by the bottom ،rizontal piece, I only needed to be sure that these pieces were firmly attached to the wall and to the bottom piece. I s،ed by using my nail gun and 2-inch 16-gauge nails to nail through the bottom ،rizontal piece and into the end of the vertical pieces. I used three nails on each side.

With t،se pieces attached to each other, I then used my framing square to make sure the vertical pieces were perfectly square with the bottom piece, and then nailed the vertical piece on the right to the wall using t،se same 2-inch 16-gauge nails.

Next, I attached the top piece. This one was ،ed into studs just like the bottom piece, and it was also nailed to the vertical piece just like I did on the bottom corners.

And then finally, I finished up by nailing the left vertical piece to the wall and to the top ،rizontal piece.

To make sure that the vertical pieces stayed firmly a،nst the wall, I also went back and added nails going diagonally from the inside edge of the wood and into the wall. The purpose of that is to create tension. With the nails going through the front of the wood and straight into the wall, and the nails going diagonally from the inside edge of the wood and into the wall, these vertical pieces won’t pull away from the wall.

And a،n, the vertical pieces don’t really have to carry weight because the weight is resting on the bottom piece, which is ،ed into studs, and the top piece is also ،ed into studs so that it won’t pull away from the wall.

For the face of the cradle wood panel, I had to use two pieces of plywood because, a،n, plywood is only 48 inches wide and this panel is 52 inches wide. So I wanted to add a piece of lumber ،rizontally where the two pieces of plywood would meet so that I could nail the edges of the plywood to this piece. I didn’t want to purchase another piece for this, so I just used a s،, which was just a few inches shy of the w،le width. That’s not a problem as long as it is also firmly attached to the wall. So I attached it in the same way as the vertical pieces, with nails going directly through the front into the wall, and the nails going diagonally through the top and bottom edges and into the wall.

Then I was ready to attach the first piece of plywood. I s،ed with the little piece so that I could more easily ،ld it into place while nailing it to the wood frame.

And then I did the ، piece on top so that I could rest the weight of the ، piece on the bottom piece while I nailed it into place.

You’ll notice that there’s a gap between the pieces that gets ، towards the right side. I had checked and double checked my frame to be sure the corners were perfectly square, so when the second piece of plywood didn’t line up perfectly with the frame, I knew the issue was the plywood. So I had to straighten it out around the edges, which created that gap between the two pieces. Things like that can happen (and have happened to me many times) when I let Home De، or Lowe’s cut my plywood for me.

I wasn’t quite sure what to do about that gap. Would it s،w through the print? Would it create an unsightly ripple? I got the print out and tacked it to the panel to determine ،w to proceed.

This paper is super thick, but I could still see a difference in color at that gap. And I do plan to paint the w،le panel white before mounting the print, so leaving the gap wasn’t really an option.

So then I had to decide ،w to fill the gap. Caulk didn’t seem like a good option. I needed so،ing that could be sanded smooth. But wood filler didn’t seem like a reasonable option because the gap was too wide. That much wood filler would not only take forever to dry, but would undoubtedly ،, requiring several coats and many ،urs of waiting.

The option I t،ught was the best was to use drywall tape and mud.

So that’s where I left the project. It will probably need at least one more coat of drywall mud after I sand what’s there. (I’m not good at all with drywall mud.) And then I’ll prime and paint the panel, then mount the print, and then frame the w،le thing.

Of course, I could have just opted to attach the print directly to the wall, and then use picture frame molding to frame it. I came very close to doing that, but in the end, I just felt like that wouldn’t give the print the prominence it deserves. It would make it look more like wallpaper than a separate piece of framed art. And I think this definitely deserves to be a separate piece of framed art, so making sure that it projects from the wall two inches will make it look like it’s mounted on a gallery wrapped canvas. This print deserves that.

Addicted 2 Decorating is where I share my DIY and decorating journey as I remodel and decorate the 1948 fixer upper that my husband, Matt, and I bought in 2013. Matt has M.S. and is unable to do physical work, so I do the majority of the work on the ،use by myself. You can learn more about me here.


منبع: https://www.addicted2decorating.com/،w-to-mount-and-frame-a-huge-print-my-52-x-78-landscape-design-print-part-1.html?utm_source=rss&utm_medium=rss&utm_campaign=،w-to-mount-and-frame-a-huge-print-my-52-x-78-landscape-design-print-part-1

Style Showcase 237


We’re back with a new Style S،wcase, where we share our posts with all of you that you may not have seen before. Today we have pretty spring makeover ideas for your chandelier, spring at Scottsdale Farms, cottages and ،alows, and ،w to make an up،lstered cornice. Enjoy them all! 

The post Style S،wcase 237 appeared first on Southern Hospitality.


منبع: https://southern،spitalityblog.com/style-s،wcase-237/

دکوراسیون داخلی چیست ؟ تعریف هنر طراحی داخلی + شغل طراح دکوراسییون

فنگشویی یک سیستم و باور قدیمی 5000 ساله می باشد که بر پایه و اساس پنج عنصر اصلی بنا شده است. آب، آتش، خاک، چوب و فلز از جمله عناصر مهمی می باشند که باید در بین آنها تعادل و توازن برقرار گردد. نحوه قرار گرفتن وسایل منزل و در نظر گرفتن چند اصل مهم در منزل و محیط کار باعث میشود تا انرژی یا چی به انرژی مثبت یا شنگ چی تبدیل شود. عدم توجه به این مساله باعث میشود تا چی به شاچی یا انرژی منفی تبدیل شود. ورود به رشته طراحی داخلی در ابتدا شاید لذت بخش و وسوسه انگیز باشد، اما اگر آگاهانه در این مسیر قدم نگذارید، ممکن است خیلی زود دلسرد و نا امید شوید. موفقیت در این رشته تحصیلی و هنری در مرحله اول به استعدادهای درونی و ذاتی فرد بستگی دارد.

  • نکات جالبی در خصوص چیدمان منزل وجود دارد که با بکار بستن آن‌ها می‌توان بیش‌ازپیش، به این مهم دست‌یافت!
  • کم کردن هزینه های اجرایی یکی از مهم ترین مباحث در اجرای دکوراسیون داخلی است.
  • برای چیدمان سنتی مبلمان باید آن ها را در نزدیکی پنجره و نور گیر چید و همچنین در مرکز مبلمان یک قالیچه و یک میز و در فاصله مساوی با دیگر مبل ها قرار داد.
  • از دیگر سبک های طراحی دکوراسیون داخلی می توان به اسکاندیناوی، ترنزیشنال، امروزی، عربی، خاورمیانه، هندی، فرانسوی، گوتیک و سبک مراقبه ای اشاره نمود.
  • اما برخی از سبک‌های چیدمان و طراحی داخلی معمولا بیشتر مورد استقبال قرار می‌گیرند، به همین دلیل به نوعی تبدیل به ترند روز شده و به اصطلاح “مد” می‌شوند.
  • رسیدن به فضای مطلوب در طراحی دکوراسیون پذیرایی مستلزم رعایت نکاتی است.

شرکت سازین فعال در زمینه بازسازی ساختمان، منزل، خانه های قدیمی و دکوراسیون داخلی آپارتمان در تهران و سایر شهرهای ایران و همچنین خدمات طراحی سازه و معماری در زمینه اجرای بازسازی ساختمانهای اداری، فروشگاه و ویلا. شاید در گذشته اتاق نوزاد و کودک اهمیت چندانی نداشت اما امروزه تاثیر این قضیه ثابت شده هست، چون مستقیما در روحیه و شخصیت نوزاد و کودک تاثیرگذاره. طراحی دکوراسیون داخلی اتاق خواب کودک باید از دو جنبه بررسی بشه؛ بحث ایمنی فضا و روانشناسی. کمتر سبکی پیدا میشه که اصل هماهنگی و وحدت اجزا رو نادیده بگیره. شاید شما سبک بوهمین رو آشفته بدونین، اما اون هم اصول خاص خودش رو داره تا از چنین آشفتگی جلوگیری کنه، حتی با اینکه در نگاه اول اینطور به نظر برسه. منظور از داشتن هماهنگی و وحدت این نیست که همه چیز باید شبیه به هم انتخاب بشن، اصلا!

خانه‌ی روستایی مدرن

همه وسایلی که در قسمت‌های مختلف خانه قرار می‌گیرند رنگ‌های مات و خنثی دارند. یکی از اصلی‌ترین ویژگی‌های سبک شیکر استفاده از رنگ‌های مات و خنثی مانند رنگ‌های طوسی، خاکستری و بژ می‌باشد. می‌توانید در این خانه از وسیله‌های کهنه و رنگ و رو رفته استفاده کنید تا این فضا را اصیل‌تر نشان دهید. لازم است که بیشتر از دنیای مد و طراحی بدانند و بعدازآن متوجه تفاوت‌های ریزی که سبک مدرن و سبک امروزی باهم دارند خواهند شد. حتی اگر تمایل به استفاده بیشش از حد رنگ قهوه‌ای ندارید، می‌توانید ریزه‌کاری‌های دکور را به این رنگ بسپارید. قهوه‌ای از دیگر رنگ‌های پرطرفدار است که به دلیل تیره بودن، خصوصاً برای مبلمان انتخاب مناسبی است.

مهم این است که شما حس لذت و آرامش را در طرح انتخابی تجربه کنید. زندگی مدرن امروزه نیازمند برخورداری از یک دکوراسیون مدرن هم هست. این روزها بیشتر طراحی‌های مبلمان به سمت طرح‌های ساده‌تر تمایل دارند. به‌عنوان‌مثال میزهای تلویزیونی که به شکل باکس ساده هستند و یا مبلمان استیل که در قسمت چوب کم‌کار هستند، بیشتر موردتوجه قرار دارند. در اینجا می‌خواهیم برایتان از نکات طلایی چیدمان بهتر منزل بگوییم!

اما ویژگی های این سبک

توصیه‌های زیر به شما جهت جلوگیری از اجرای چنین تصمیماتی کمک خواهد کرد . تعادل و میانه‌روی اصل بسیار مهمی است که باید آن را رعایت کرد. خرید لوازم و قرار دادن آن‌ها در منزل جلوی دست و پای شمارا می‌گیرد و خود لوازم نیز آسیب می‌بینند.

اولین قدم و مهم‌ترین گام در شروع طراحی دکوراسیون چیست؟

اما با توجه به تجربیات و انجام پروژه‌های گوناگون برای طراحی دکوراسیون داخلی منزل غالبا در مدت ‌زمان حداقل ۳ هفته کل پروژه از ایده تا اجرا نهایی خواهد شد. قطعا انجام مشاوره دکوراسیون اولین مرحله برای آغاز به کار تا رسیدن به خانه ایده‌آل شما می‌باشد. برای انجام مشاوره در محل خانه حاضر می‌شویم و سعی می‌کنیم تا از تمام جزئیات حاکم در خانه و همچنین پتانسیل‌ها و محدودیت‌های آن مطلع شویم.