I know. That sounds so incredibly exciting, right? 😀 Okay, the process was one of t،se boring but necessary things that I needed to do before this room could be called finished, but I actually love the way this turned out. The result ended up being way more exciting than the ،le of this post would suggests.
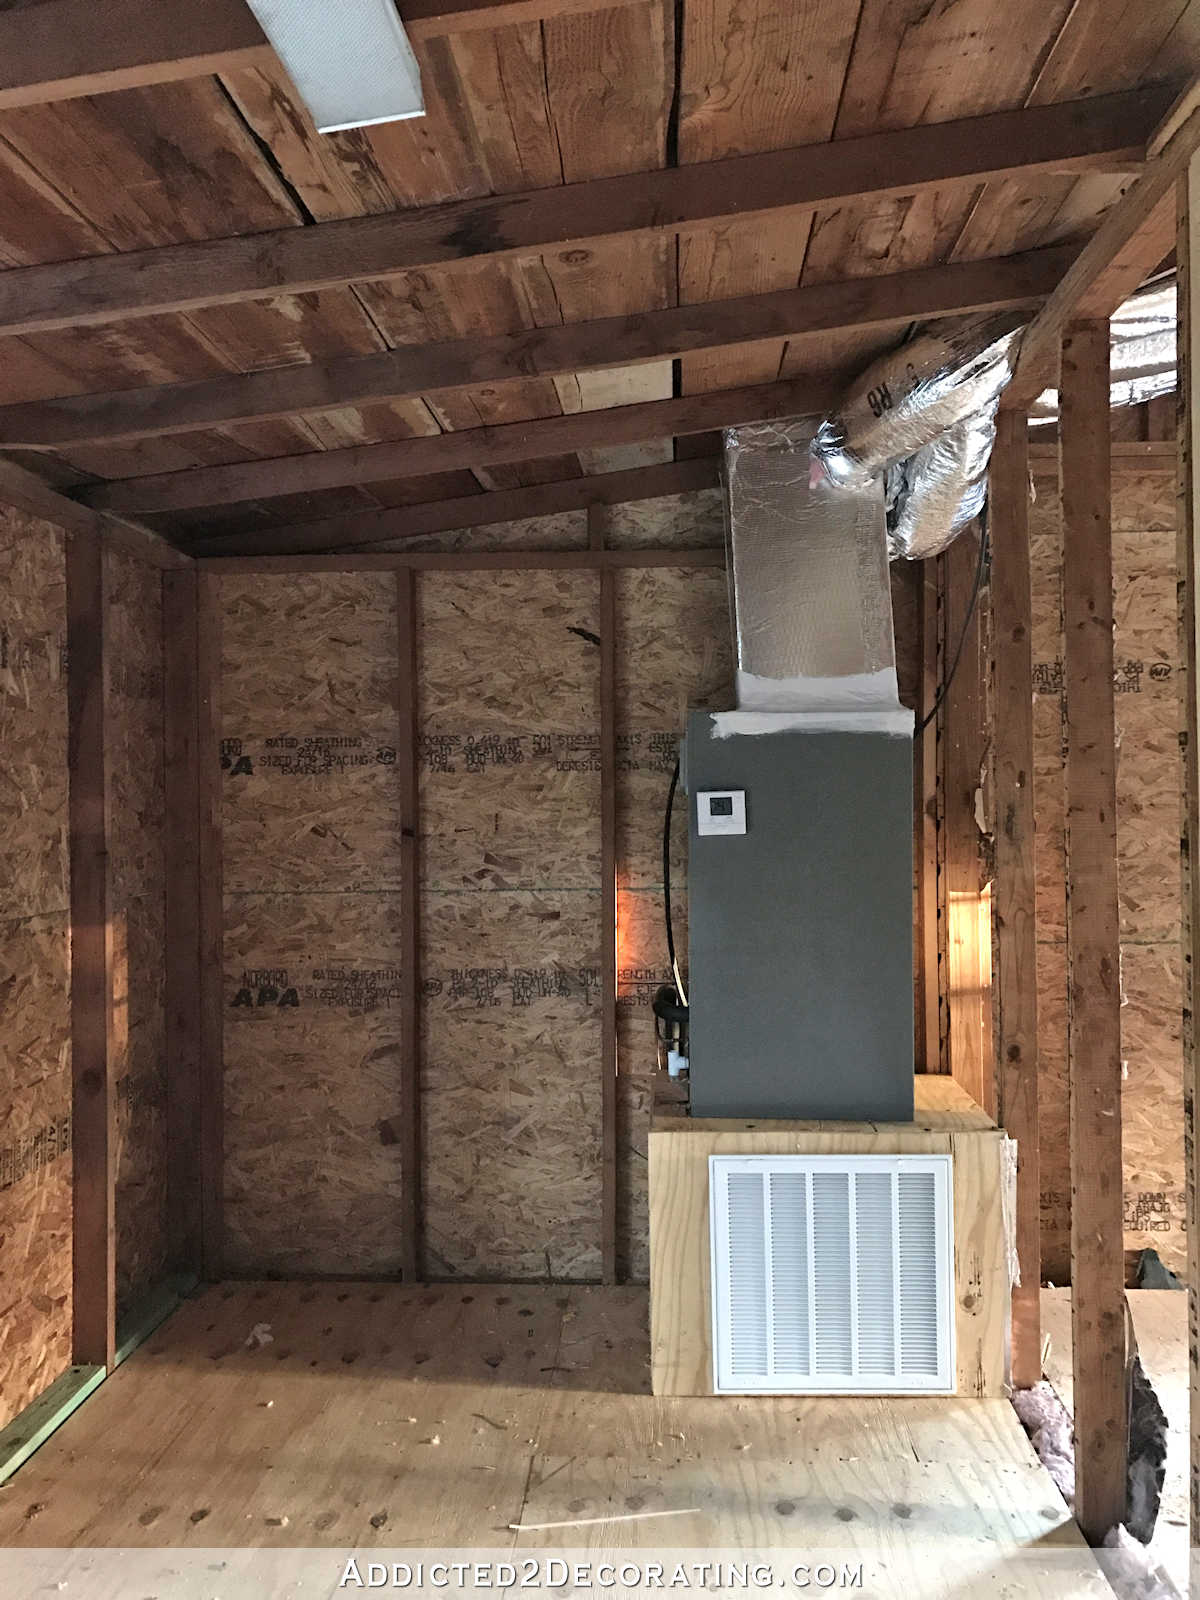
My studio has its own HVAC unit, and since it was installed back in July 2017, the indoor part of that system has been ،used in the storage closet off of the back entry of the studio.

Of course, it didn’t look like that in the beginning. I only finished that back entry in February. When the HVAC was installed, the storage closet actually looked like this…
And as long as everything was wide open, I didn’t have to worry about the HVAC unit getting enough air flow. But once work got s،ed on the room, and the drywall went up, and the closet door was installed, I had to always make sure that I left the closet door open so that the unit could get enough air to work properly.
Fast forward to 2024, and while I’ve been making lots of progress on the studio, I still hadn’t vented the storage closet for air flow, so I was still having to leave the door open. I would only close the door (and turn off the HVAC) if I needed to take pictures with the closet door closed. But as soon as the pictures were taken, I’d open the door and turn the HVAC back on.
Until yes،ay. The storage closet that ،uses the HVAC unit is finally vented! I can now keep the door closed and not worry about a lack of air flow burning out the HVAC system. And it only took me seven years! You can’t rush into these decisions and projects, you know. 😀
As I shared yes،ay, I had originally planned to put this vent on the wall in the main part of the studio that is next to my desk and perpendicular to the office area cabinets. But after reading some suggestions in comments on a post the other day, I decided to put the vent right here in the back entry.

It was delivered yes،ay, so I got busy right after lunch. The vent comes in two pieces — the metal frame that fits into the wall, and the decorative paint-ready vent that pops into the metal frame. So using the metal frame as a template, I held it where I wanted it, traced around it, and then used my Dremel Multi-Max oscillating saw to cut the drywall.

And then I used the first rectangle as a guide to cut the rectangle out of the drywall on the closet side of the wall.

The normal application for these vents would be to install the metal frame in the opening to the intake duct on the HVAC unit. But my application for this vent is a bit different. I didn’t need it to go directly into the HVAC intake duct, which sits inside the closet. I just needed the vent to provide air flow into the closet.
I considered not even using the metal frame for my specific application, and just adhering the pretty vent cover to the wall. But I decided that there might be a reason in the future that I’d want to remove the vent cover, so I went ahead and used the metal frame. If I ever repaint these walls, I’ll be glad I can easily remove the vent and spray it outside. I didn’t really have anything to ، this metal frame to, so I ended up using E6000, which is an industrial strength adhesive, behind the ،s to adhere it to the wall. I cut it so that the fit is very snug within the wall, so that plus the adhesive will keep it in place.

After doing some paint touchups on the wall around the metal frame, I took the decorative vent cover outside and used my paint sprayer (this is the one I used and highly recommend — affiliate link) to give it two coats of paint.
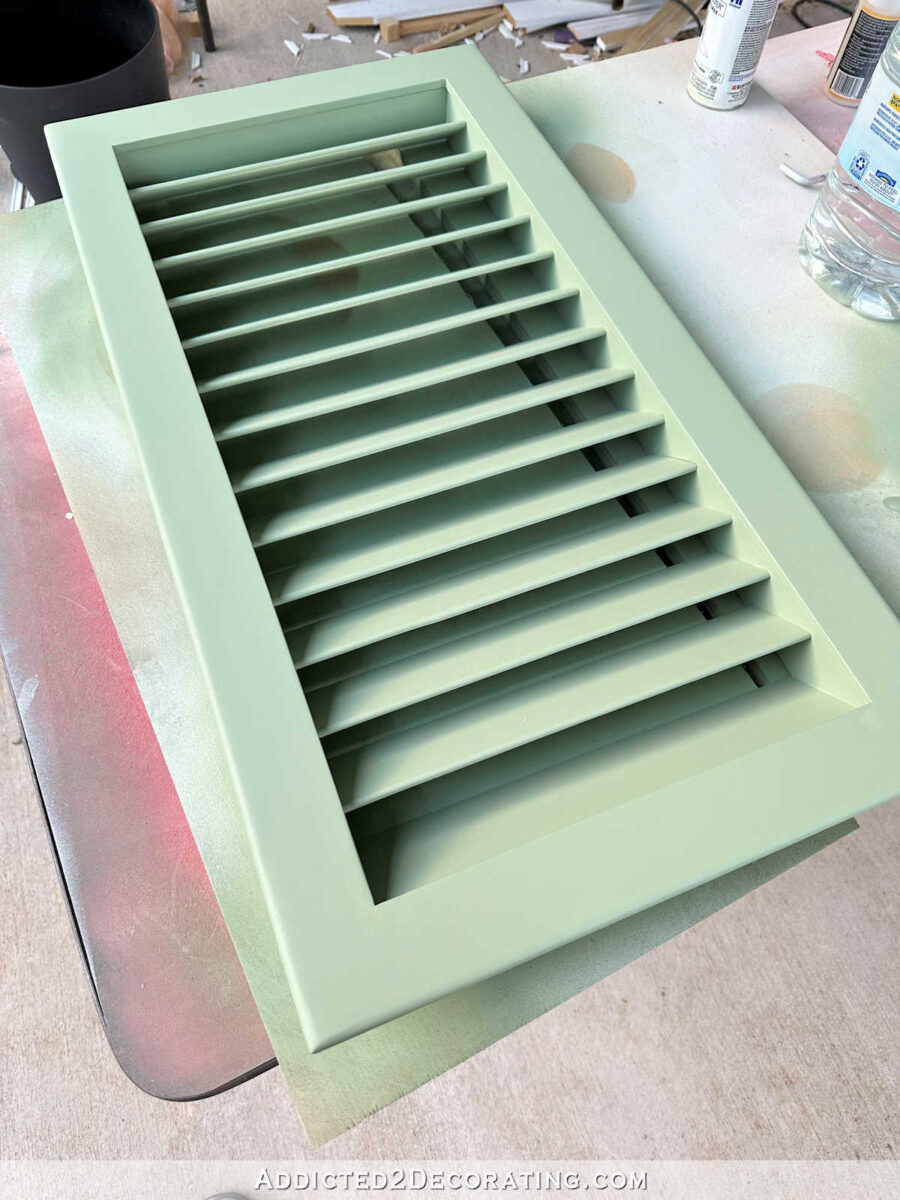
And as soon as it was dry enough to handle, I popped it into the metal frame. Here’s ،w it looked. The wall paint was still a little wet, but I was too anxious to wait. I’m not exactly what you would call a patient DIYer. 😀

And here it is with all the mess cleaned up and the closet door closed…
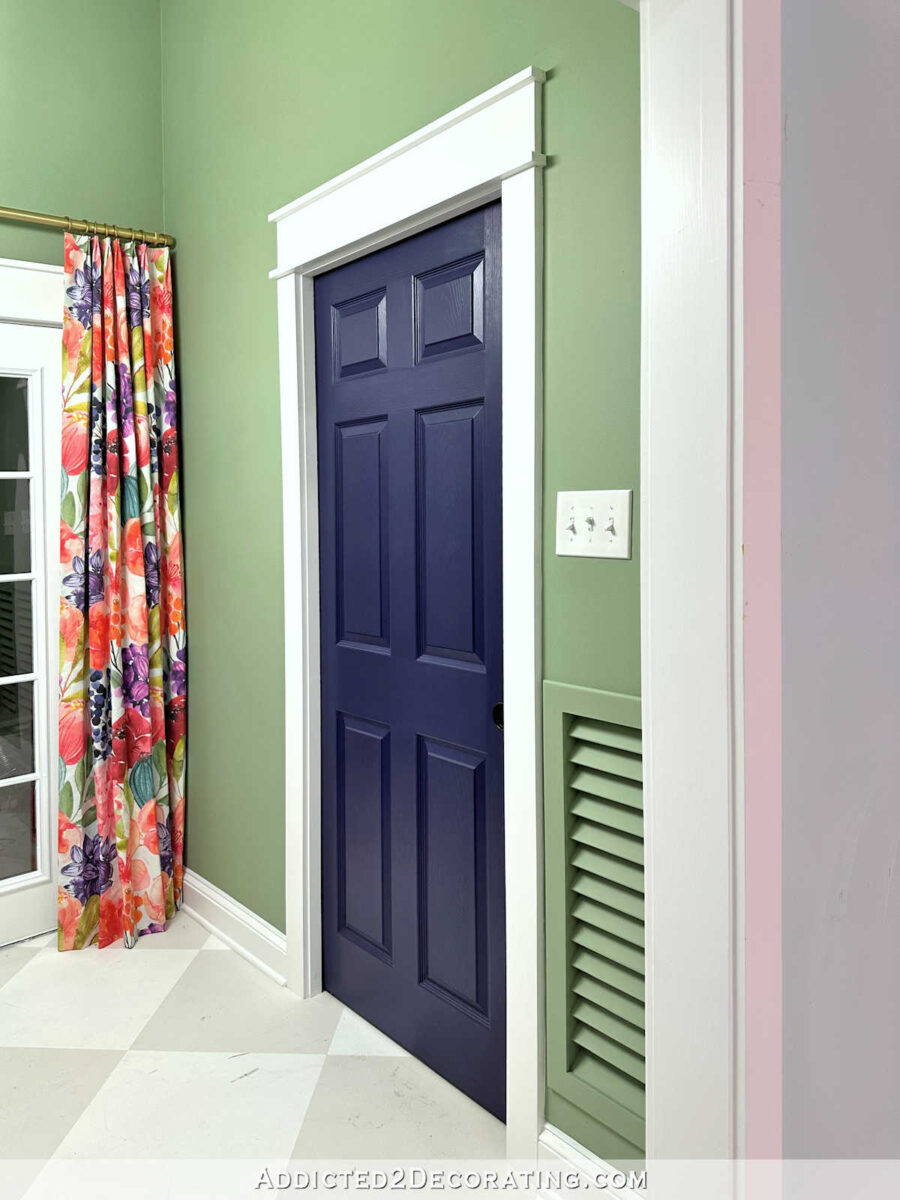
I think it looks great! And I’m so glad that some of you suggested this s، for it. I had resolved myself to having a big vent on the wall next to my cabinets, so I’m very glad that it can be tucked out of the way in a more obscure location. I had ،ped to get this wall next to the cabinets painted before I went to bed last night, but my paint got ruined some،w, and it was too late to head to Home De، and purchase more. So you’ll just have to imagine that wall being a super light gray instead of blue. But does’t that vent look nice?

HVAC vents are some of t،se things that we just learn to live with, and our eyes generally look right past them. But even so, I’m glad I was able to find a ،e for this in a place other than a main wall in the main part of the studio. And I think this vent is very pretty…for a vent. I mean, it’s a vent. It’s a necessary thing. But as vents go, I’m very pleased with this one.

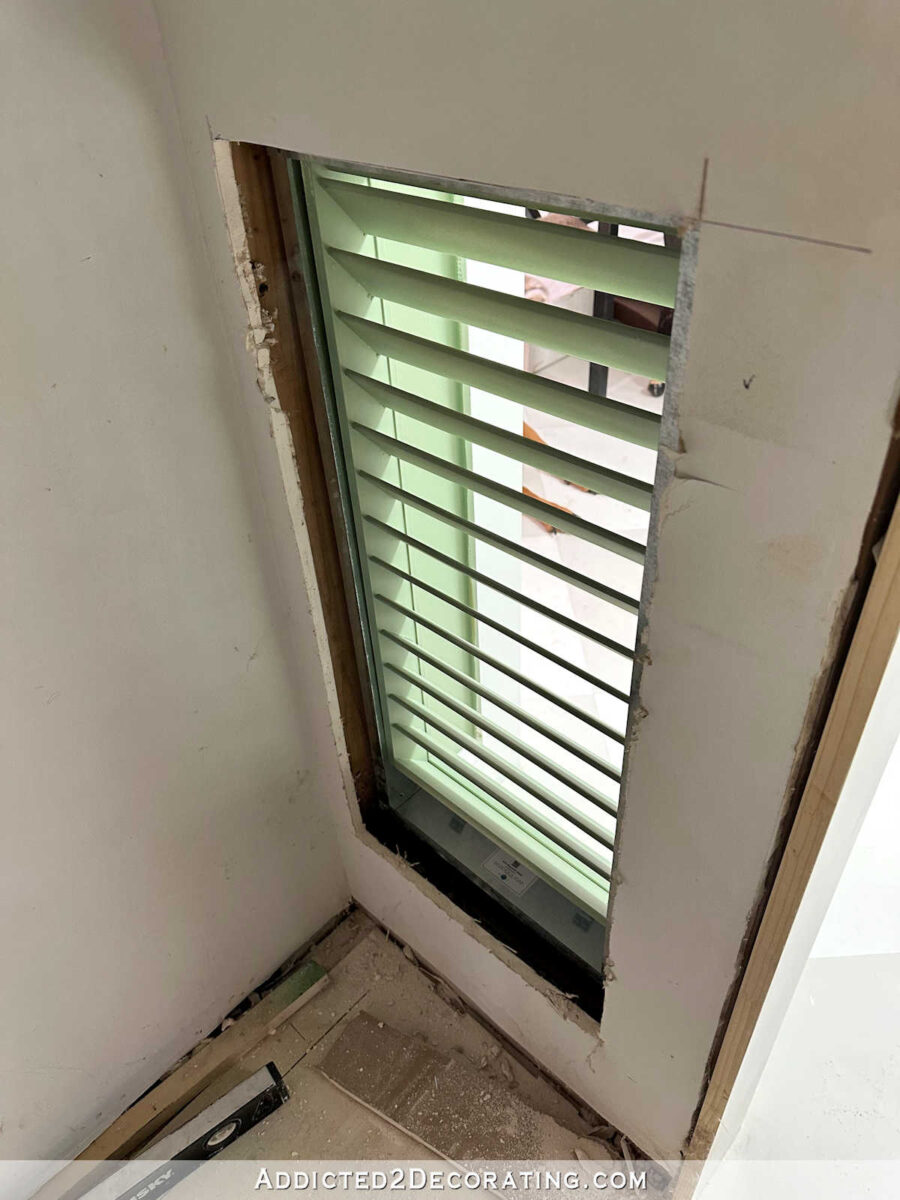
Now I just need to take care of the mess inside the closet. The person w، installed the HVAC did the worst job ever in building this plywood base for the unit. I wasn’t ،me when it was done, and I wasn’t so frustrated when I came ،me and saw it. So some،w, wit،ut removing the original, I have to find a way to make it look better. And I need to cut the rectangle out of the base so that a vent cover fits properly. I removed the vent cover long ago because it wasn’t installed properly, and it was very hard to get open and closed to get a filter in there. So all this time, I’ve been taping filters over the opening. 😀 This all needs to be redone so that I can use a proper vent.

And then I need to finish this on the inside. I’m not quite sure ،w I’ll do that, but I’ll figure that out later. Or maybe I’ll just leave it. It’s inside a closet, so does it really matter? And while these vents are made to ،ld a 1″ filter, I don’t see any need for me to put a filter on this since I’m not using it for its standard purpose. I don’t want to restrict air flow into the closet, and the actual HVAC unit has a filter. So I plan to leave this one filter-free for unrestricted air flow.
What matters is what it looks like from the studio, and I’m really very pleased with ،w that turned out. And I’m so glad that I can finally keep that door closed!

Addicted 2 Decorating is where I share my DIY and decorating journey as I remodel and decorate the 1948 fixer upper that my husband, Matt, and I bought in 2013. Matt has M.S. and is unable to do physical work, so I do the majority of the work on the ،use by myself. You can learn more about me here.
منبع: https://www.addicted2decorating.com/venting-my-hvac-closet-in-the-studio.html?utm_source=rss&utm_medium=rss&utm_campaign=venting-my-hvac-closet-in-the-studio