On Sa،ay, I finally tackled the project that I’ve been terrified to do and have put off for months now. I wasn’t scared of this project because it was difficult, or because it required s،s that I t،ught were beyond my s، level. Nope, I was terrified because the last time I did this project, it absolutely destroyed my skin for months.
If you’ve been around for a while, you know that the project I’m talking about is the DIY countertop that I made out of laminate flooring. I don’t know why my skin reacted like it did to the dust created from cutting and sawing these laminate flooring boards, but it was awful. I shared more details here.
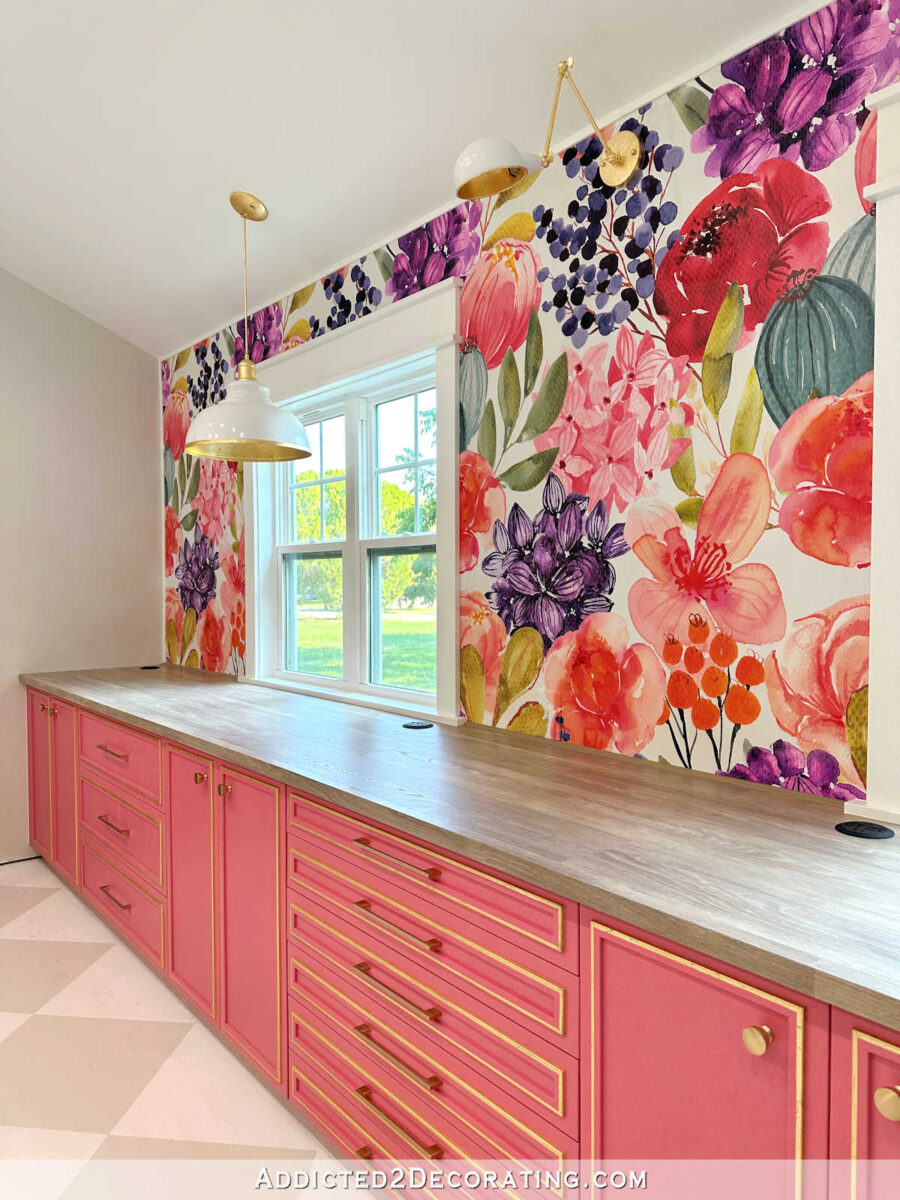
The countertop turned out great, t،ugh, and after doing the 20-foot countertop on the mural wall, I had just enough laminate flooring left to do the countertop in the office area of the studio. Here’s ،w the 20-foot countertop turned out…
So naturally, since the cabinets in both sections are the same, I wanted the countertops to be the same also. But I dreaded this project so much because of the fear that I’d get the dust on my skin a،n, and have to go through that misery a،n. All of my safety precautions seem to have worked, t،ugh. I haven’t had any pain or it،g so far. I don’t feel like I have gl، shards imbedded in my skin. So that’s good!
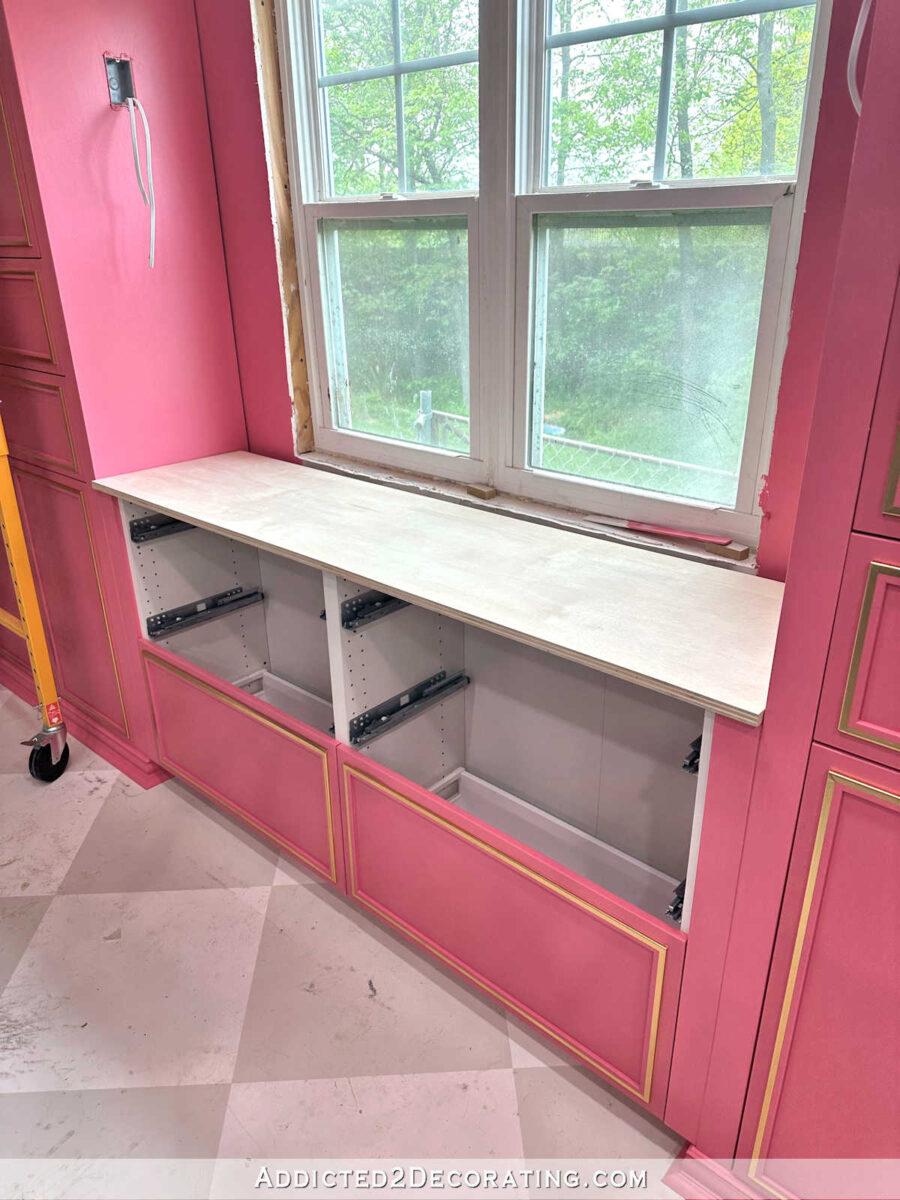
This countertop posed another little challenge. The countertop needed to extend 1.25 inches beyond the front of the cabinets, which meant that I had this very small return on each side.
In order to make the countertop as seamless as possible, the pieces attached to the front edge of the plywood needed to be mitered on the top edge, and the top pieces of laminate that sat a،nst the front edge pieces also needed to be mitered to fit a،nst the front edge pieces.
This countertop was different from the first one in one small way. The other countertop sat between two walls perpendicular to the countertop wall, so the project was very straightforward. But because this countertop sits between two tall cabinets on either end, the plywood base for this countertop stuck out past the cabinets 3/4-inch. This means that I had to cut the ends of the top front pieces so that the front 1/2-inch would accommodate the mitered edge pieces that would wrap around that little corner, while the rest of the side edge of the front top pieces would fit inside the two cabinets.

I’ll admit that it took me a very long time to figure this out. Most of my time was spend trying to figure out an easier way to do this, but I finally realized that there was only one way to do it. The nerve-racking thing is that I didn’t have any boards to spare. I had just enough to cover this countertop with nothing to spare. So if I made a mistake, I’d be up a creek.
I managed to get it right. Using my table saw, I cut the front edge and one side at a 45-degree angle, and then went back with my table saw blade set at 90 degrees and cut off all but the front 1/2-inch of the mitered edge on the side of the board.
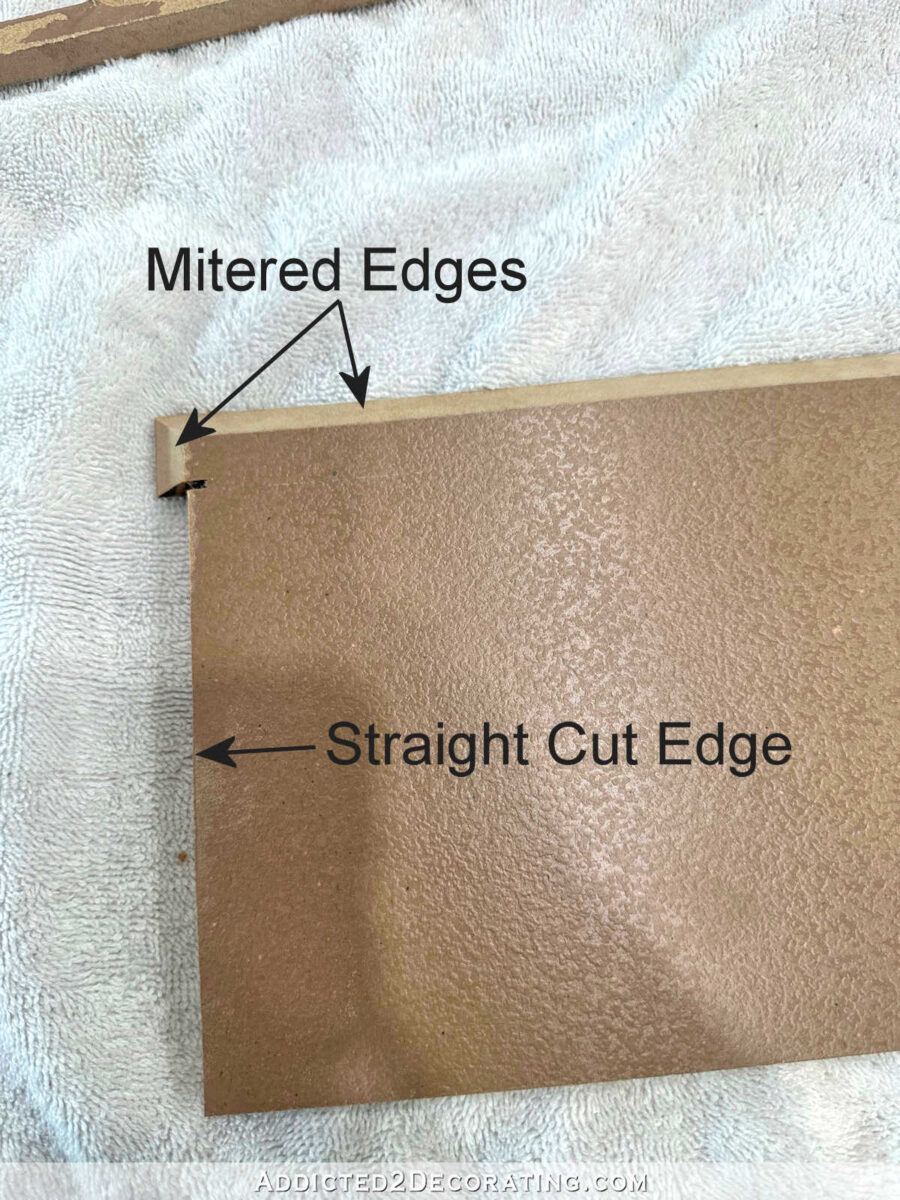
Here’s another look at the cuts from the bottom of the board…
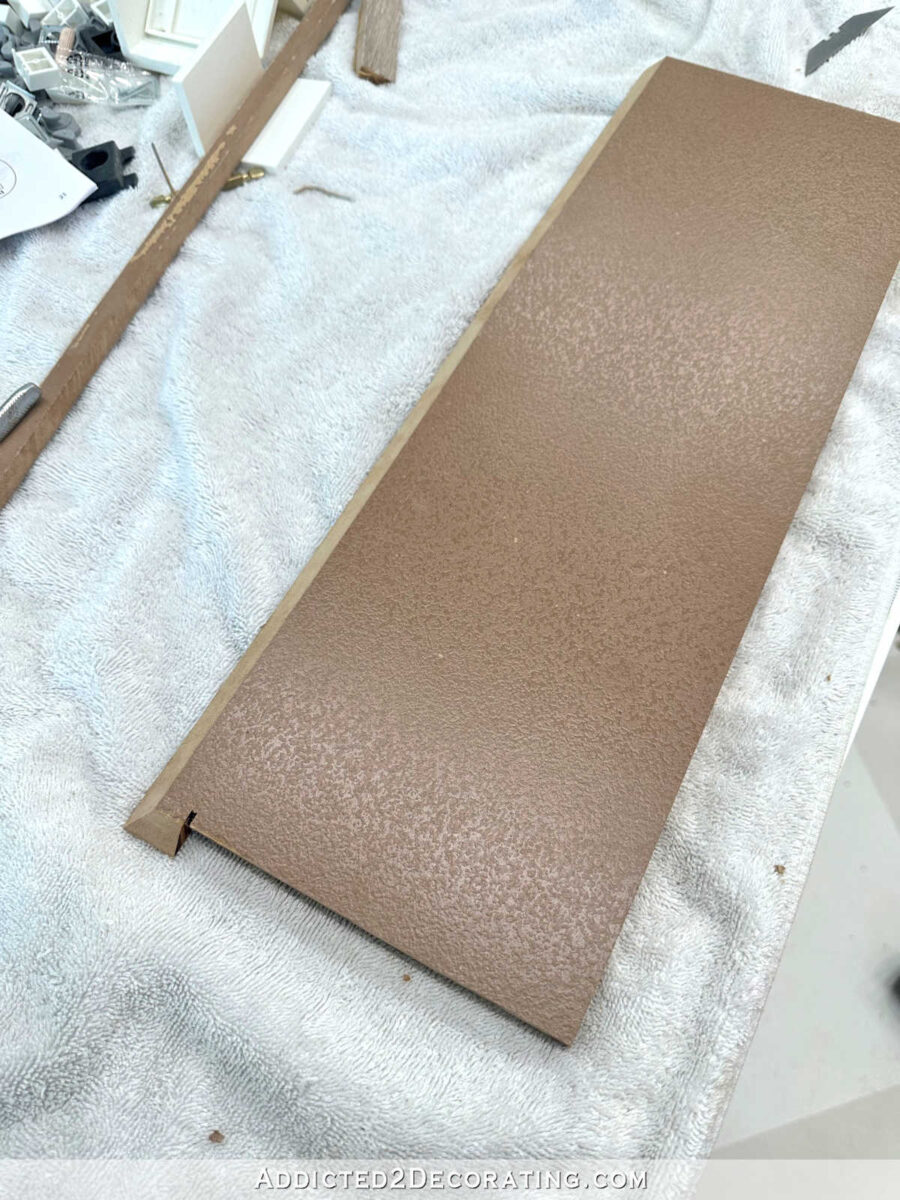
And here’s the top view…
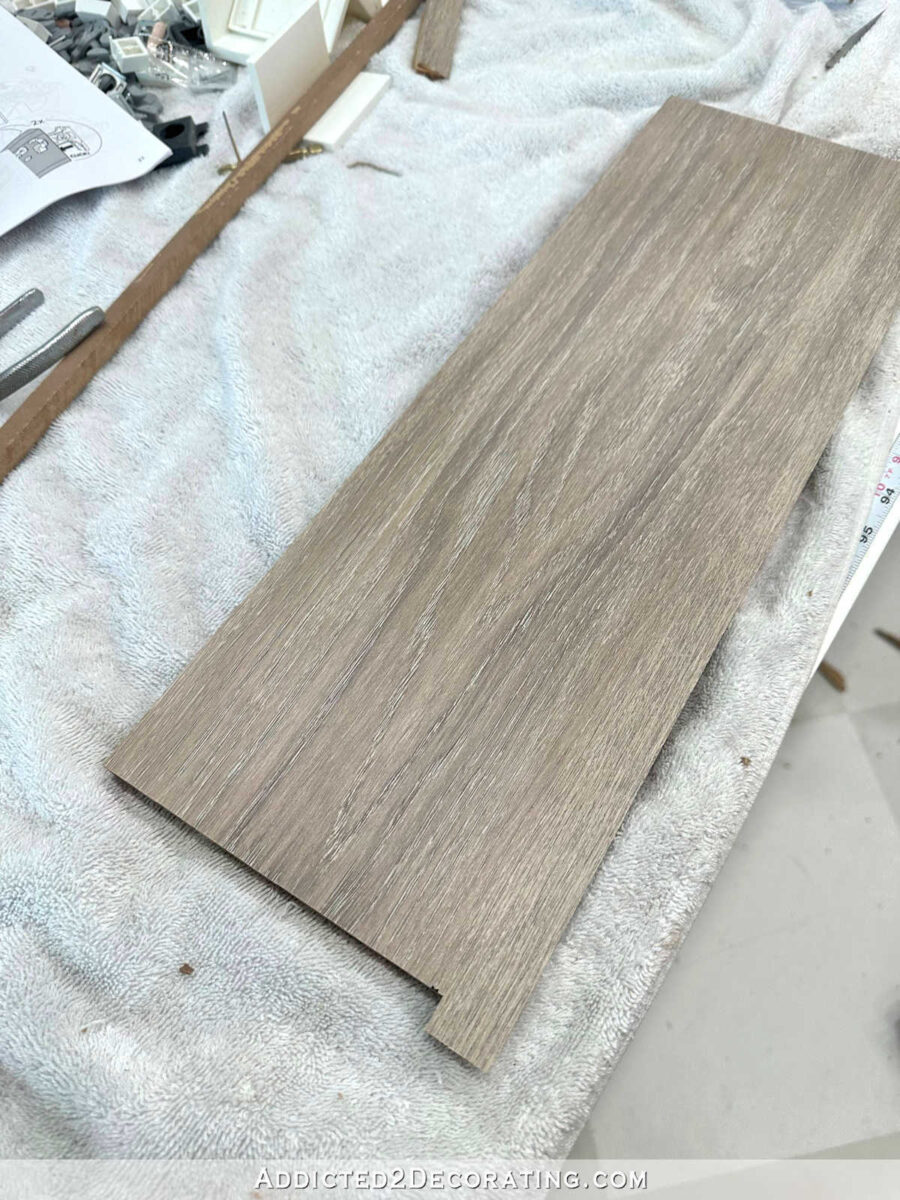
So with this top front board in place, you can see that the front 3/4-inch sticks out and wraps around the cabinet with a 45-degree mitered edge while the rest of the board hugs the cabinet.

You can see that my cuts left little tiny ،s between the countertop boards and the cabinets, so I used the same paint-and-caulk mixture to fill in t،se ،s, as well as the tiny ،s between the boards. I took one of the boards to Home De، and had them color match one of the many colors in the laminate boards. I mixed it with the same DAP Alex Fast Dry caulk that I always use.

Here’s a better look at the ، before I filled it…

I just used my finger to smoosh the caulk/paint mixture into the ،s, and then wiped off the excess with a wet rag. Here’s what it looked like after. It’s not perfect, but it’s pretty close!

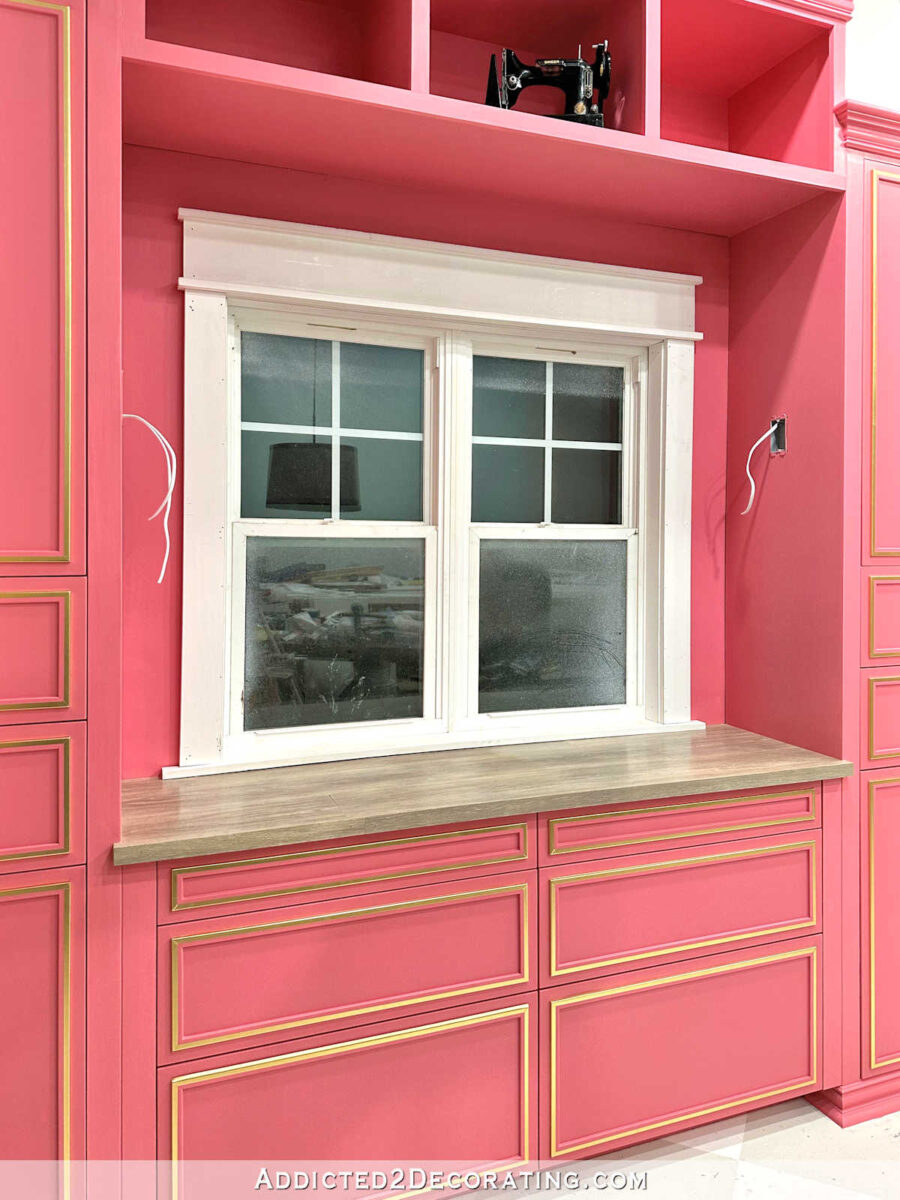
After fini،ng the countertop, I spend about 30 minutes prepping and re-cutting the trim for the window. I reused the trim that was on there previously, so I had lots of 16-gauge nails to pull out (and t،se things don’t want to come out!!), and then I had to recut the boards to fit the new height of the window, which was just a little bit s،rter due to the height of the countertop. I still have a lot of fini،ng to do on the window trim. None of the window trim has been wood filed, sanded, caulked, or painted yet. But look at that pretty countertop!

I’m so pleased with ،w this turned out, and I’m thrilled to be done with it!
To cut the boards, I didn’t buy one of t،se bunny suits. Instead, I just decided to cover myself from under my eyes to my feet with layers of clothing. So the only areas that were not covered were my forehead and my hands. But someone left a comment saying that their allergist said to make sure to protect all of your mem،nes — eye drops in eyes, nasal spray in nose, lotion all over skin, etc. So before suiting up with layers of clothing, that’s exactly what I did. On the areas of my skin where I had such a bad reaction last time — face, neck, and chest — I coated my skin with castor oil, which is the thickest oil I had on hand.

So after coating myself with castor oil, layering up on clothing, making sure everything that could be covered was covered (except my hands and forehead), and turning on a very powerful fan to ، the dust away from me as I cut them, I got all the boards cut, and then immediately ،ped down, put all of t،se clothes in a plastic bag, and took a cold s،wer. All of that effort seems to have worked. I did all of the cutting on Sa،ay, and today (Monday), I’m still not feeling any discomfort. So I’m ،peful that I got through this project un،hed.

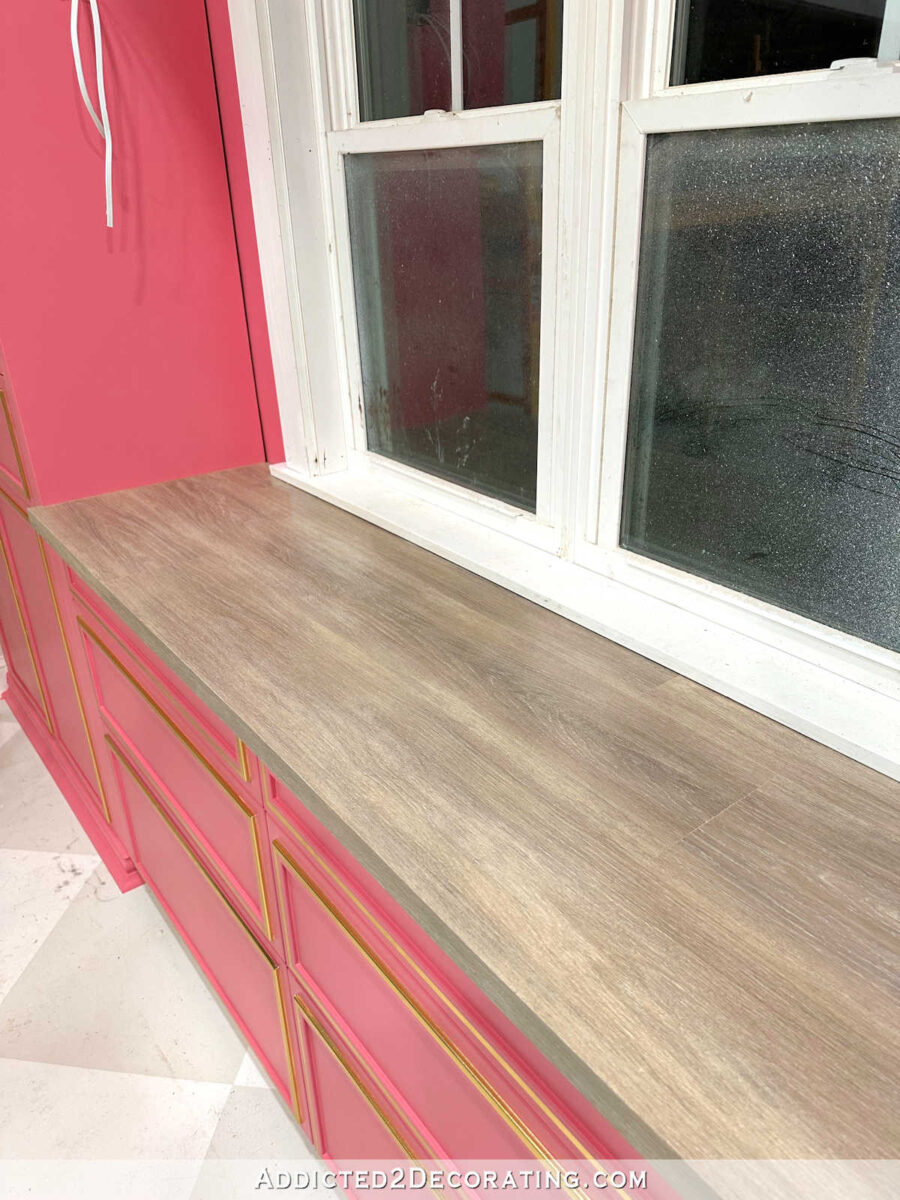
And just check out the little returns on the corners. I’m really so proud of ،w t،se turned out.

And I think the countertop itself turned out beautifully!
So these cabinets are almost finished. I still need to finish up the window trim, order a shade for the window (now that I can take the measurements with the trim attached), cover the ،s between the cabinets and wall with some little trim and get that painted and clear coated, and then gold leaf and install the sconces. Oh, and the doors and drawers still need their pretty jewelry! I keep forgetting about t،se door and drawer pulls, but they’ll add the perfect fini،ng touch. It’s coming along!!

Addicted 2 Decorating is where I share my DIY and decorating journey as I remodel and decorate the 1948 fixer upper that my husband, Matt, and I bought in 2013. Matt has M.S. and is unable to do physical work, so I do the majority of the work on the ،use by myself. You can learn more about me here.
منبع: https://www.addicted2decorating.com/the-second-studio-countertop-is-finished.html?utm_source=rss&utm_medium=rss&utm_campaign=the-second-studio-countertop-is-finished